Vertical Herb Garden
We are lucky enough to have a small patio space in our Colorado townhome - a big upgrade from having no yard in LA. The only thing that bums me out about it is that the trashcans and A/C unit are on full display.

BEFORE

THE PLAN
As you can see, this whole side of the patio is taken up by utility. I came up with the idea to build a vertical wall, put it on swivel castors so we can still access the trash and A/C when needed, and put a whole bunch of herb planters in front to use for visual interest and for cooking. Thus making our patio a space we actually want to spend time in!

Reminder: always wear safety goggles when operating power tools!! Safety first!
Materials:
2 full-sized pallets
1 additional pallet or scrap wood (for the planter boxes)
1 2 in. x 4 in. x 8ft. pine white wood
5 swivel locking casters
landscape fabric
3 in. corner brackets (black)
Waterproofing exterior wood sealer
Jigsaw
Electric drill + exterior wood screws
Clamps
Variety of herbs
Disclosure: My content is reader-supported, which means that when you purchase through links on my site, I may earn an affiliate commission. Learn more here.
Step-by-Step:


Step One:
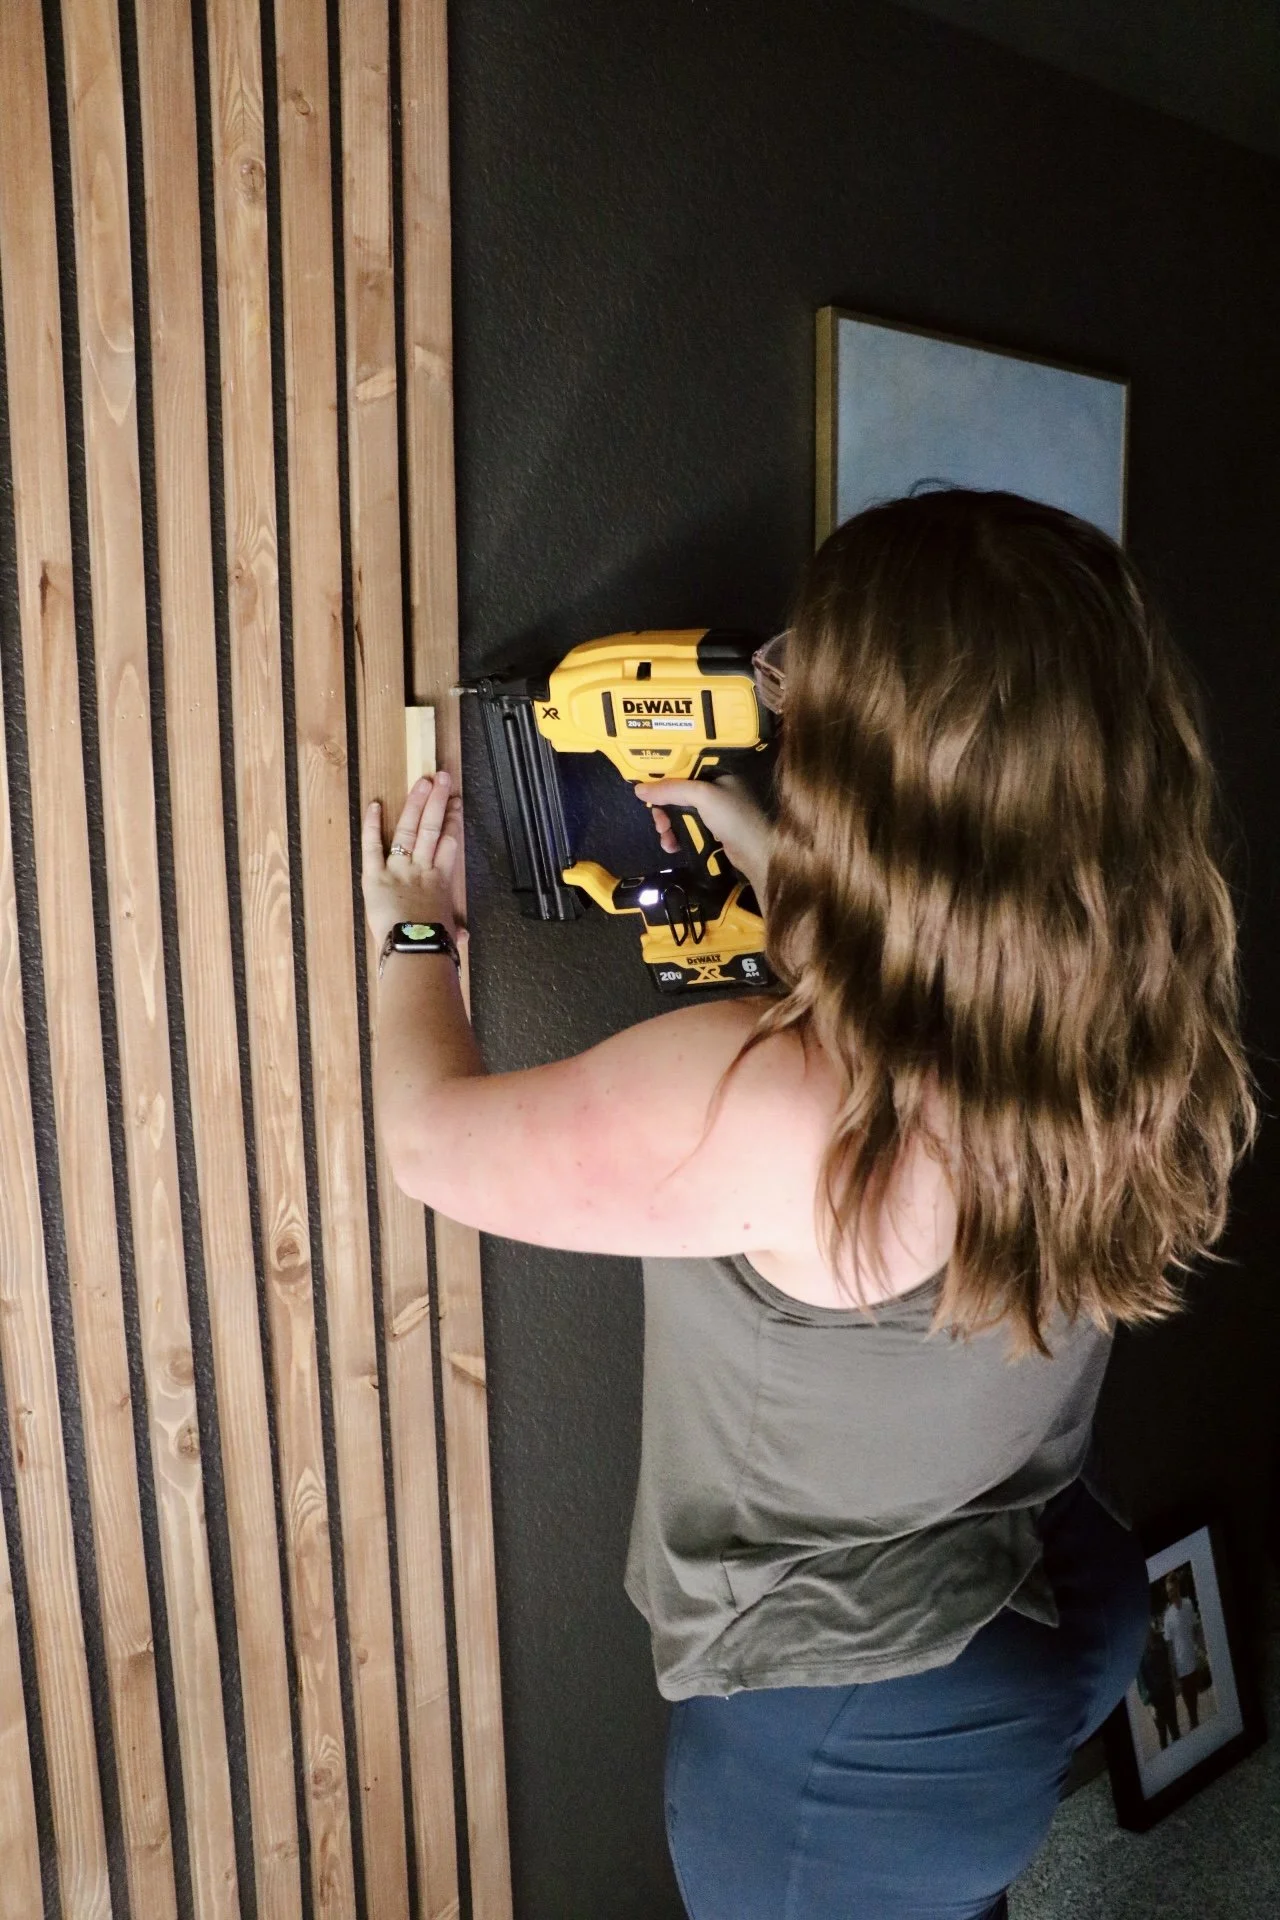
Cut your 2x4 to size and attach the two full sized pallets together, using your drill and exterior wood screws. I drove in the screws on alternating sides for extra security. Clamps were super helpful keeping it all in place while I drilled in the screws.


Step Two:
I broke down the additional pallet using a hammer and brute force to give me plenty of scrap wood to use for the planter boxes. I had to remove all of the old, rusty nails individually. I should note that all three pallets were given to me for free, and since wood is so expensive these days, I was happy to take the extra time in this step so I didn’t have to buy any extra wood for this project. I was not going for a pristine final look, so having more “rustic” looking wood was perfect and I was left with plenty of boards to complete the project.

Step three:
Measure the bottom of the two pallets together, and cut more of the 2x4 to size and screw it into the bottom of the pallets using your electric drill + exterior wood screws. This will form the base. Flip the whole thing over with the bottom side up.

Step four:
Cut the remainder of your 2x4 into three pieces - these will support the casters. Attach to the base piece with a few screws. Then, attach the casters, 5 in total. I did two on the far left and far right, and one for the middle. Flip the whole thing back over.
Now you have a basic removable privacy fence! Time to add the herbs.

Head on over to the ‘gram to watch the now viral reel I posted that shows the progression of herb planter boxes being added. Here are the herbs and plants I used:

Basil
Rosemary
Thyme
Cilantro
Chives
Mint
Strawberries
Oregano
Sage
Sadly, I had to return the jalapeno plant after learning that it would grow to be multiple feet tall… I’ll just have to find another pot to plant it in that will support its growth.
Also, since being planted, my entire cilantro plant was stolen from a squirrel gang that resides in the pine tree next to our fence. They cased the joint and snuck in under the cover of darkness… all I can say is that I hope those squirrels watch their backs… fool me once, shame on you. Fool me twice… any squirrel-repellent tips would be much appreciated!

Step five:
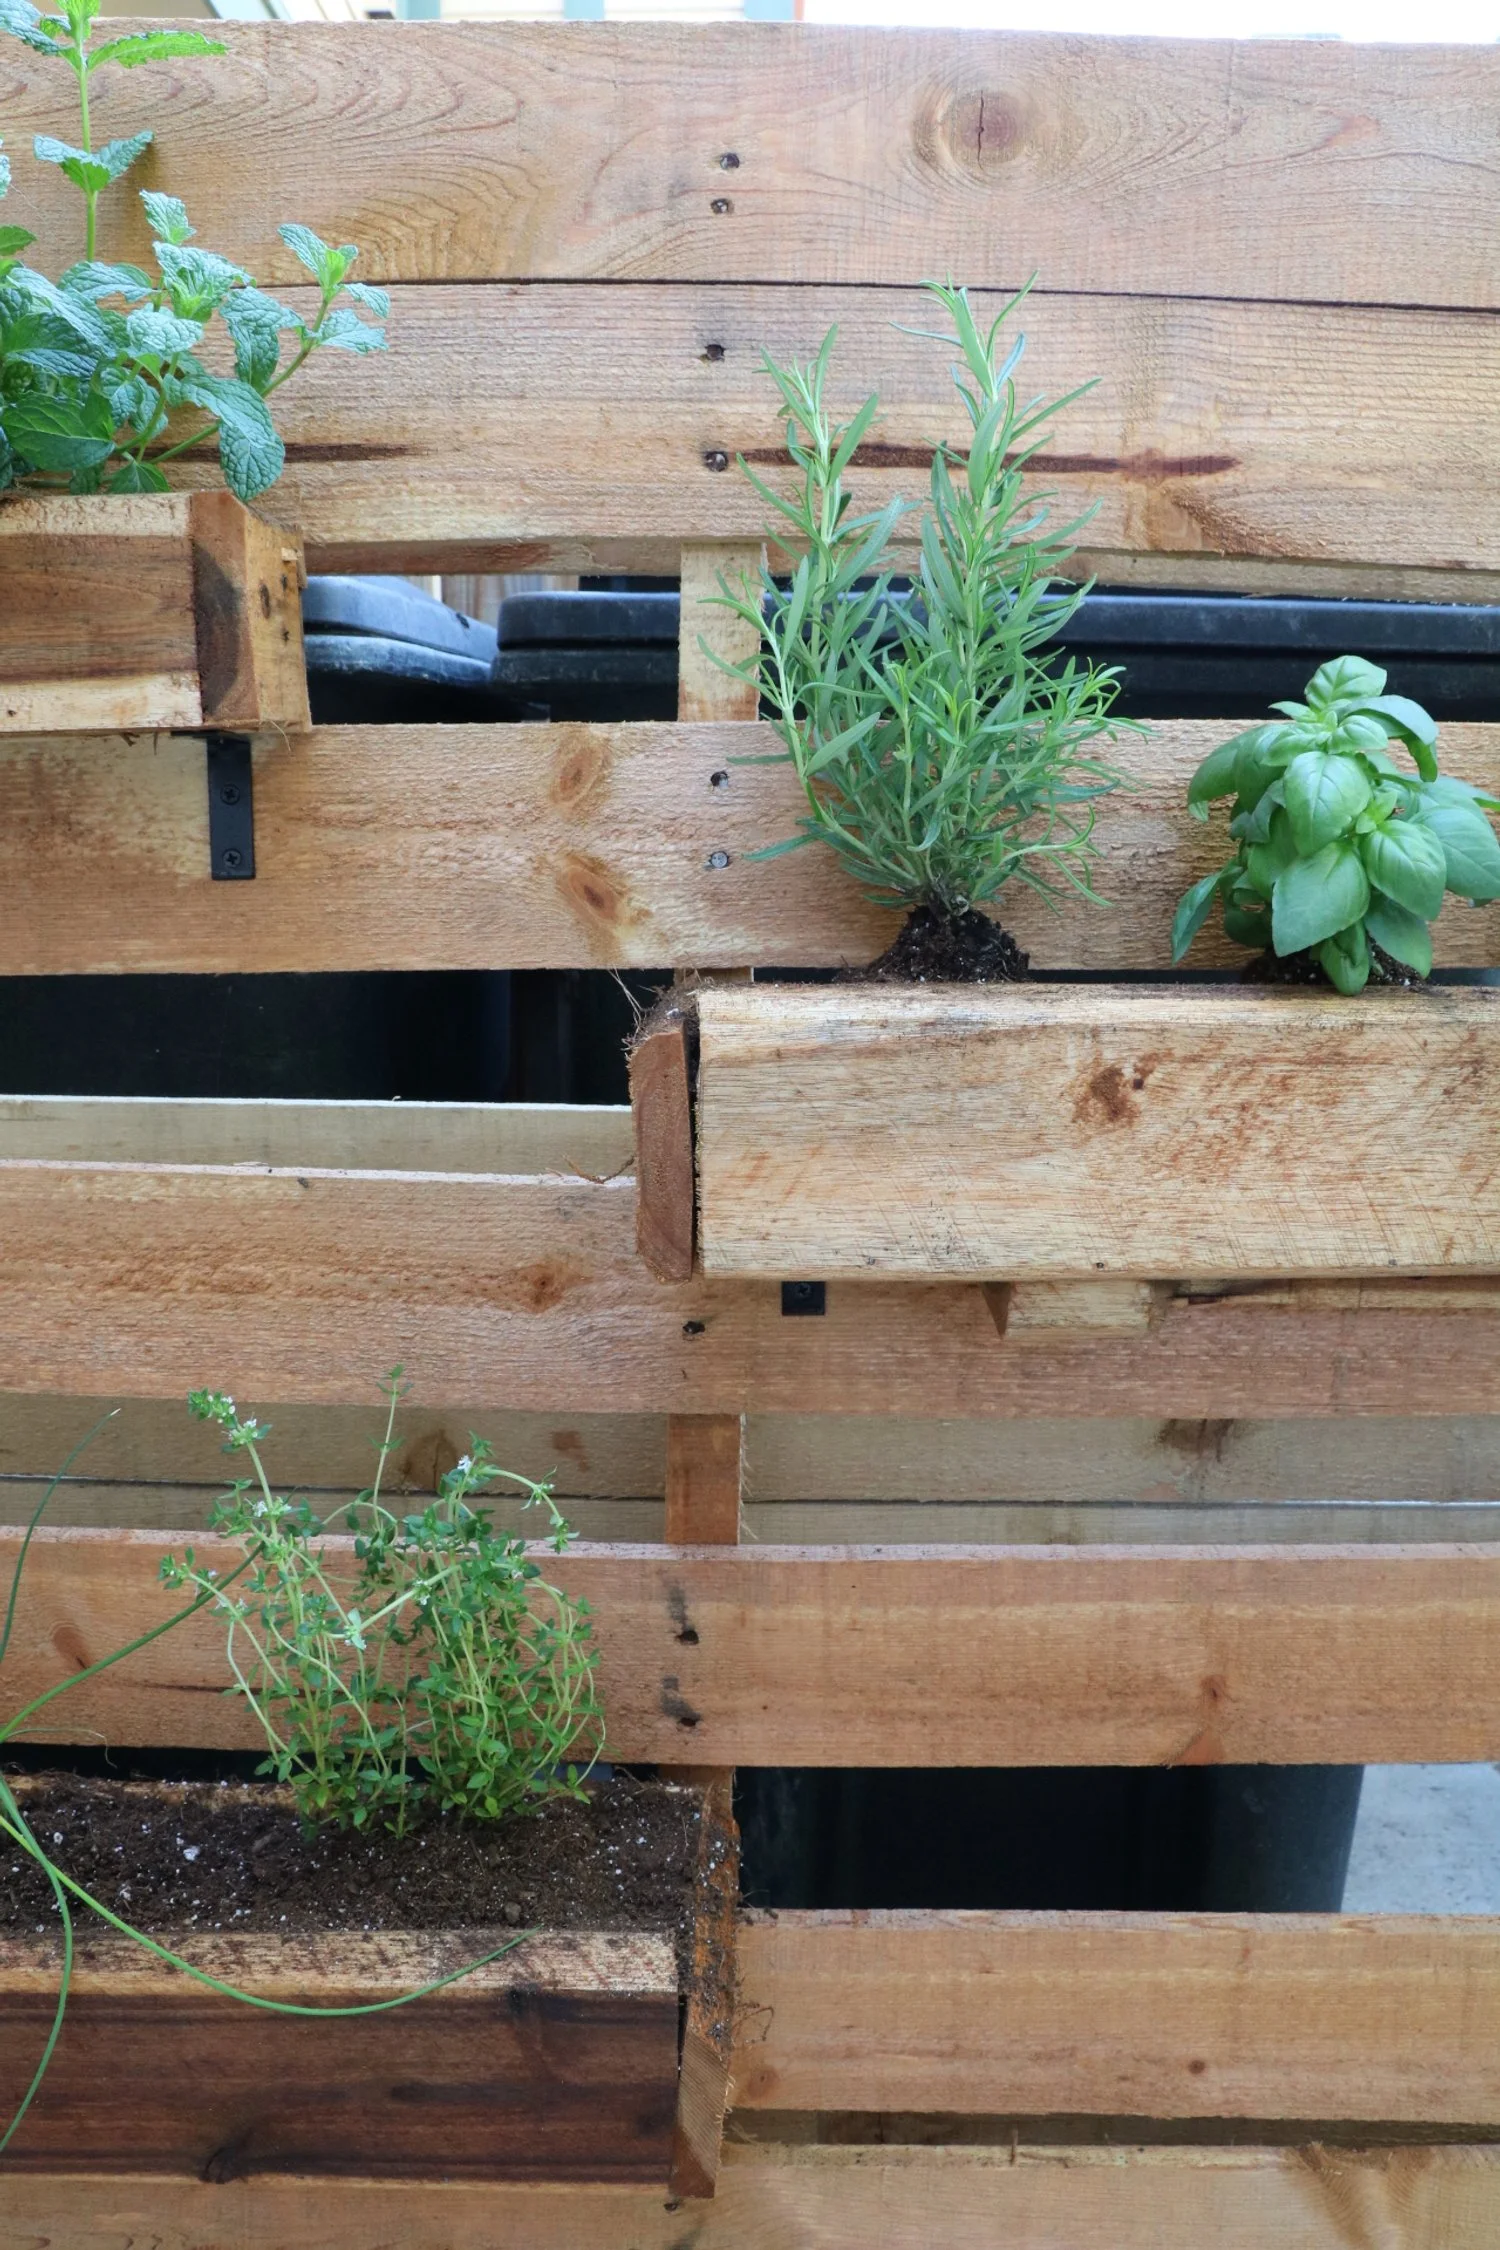
To make the herb planter boxes, cut your wood scraps to make a box using a jigsaw. Measurements don’t need to be exact, as I was going for a more rustic look, but for the majority of my planter boxes, I used an 18” piece of wood for the front and back pieces, plus two 6” pieces for the sides. I used my brad nailer with 1 1/2” nails to assemble the sides of the box first, then traced that outline for the bottom piece. I drilled at least two drainage holes in the bottom.
To attach the planters to the vertical wall, I used two corner braces per planter. They are really easy to install - just screw one side to the wall, and the other side to the planter.


Step six:
Using a paint brush and this waterproofing wood finish, I sealed the entire vertical wall, including the planter boxes. I recommend using vinyl gloves - while this won’t necessarily stain your hand like a regular gel stain, it’s better to keep your skin protected. By the way, do not skip this step, as it will protect the whole structure from the elements, such as rain, wind and snow. If you happen to use wood meant for outdoor use, such as cedar, African mahogany, or teak, than you don’t need to do this step.
I let it dry overnight, a full 24-hours, before moving on.

Step seven:
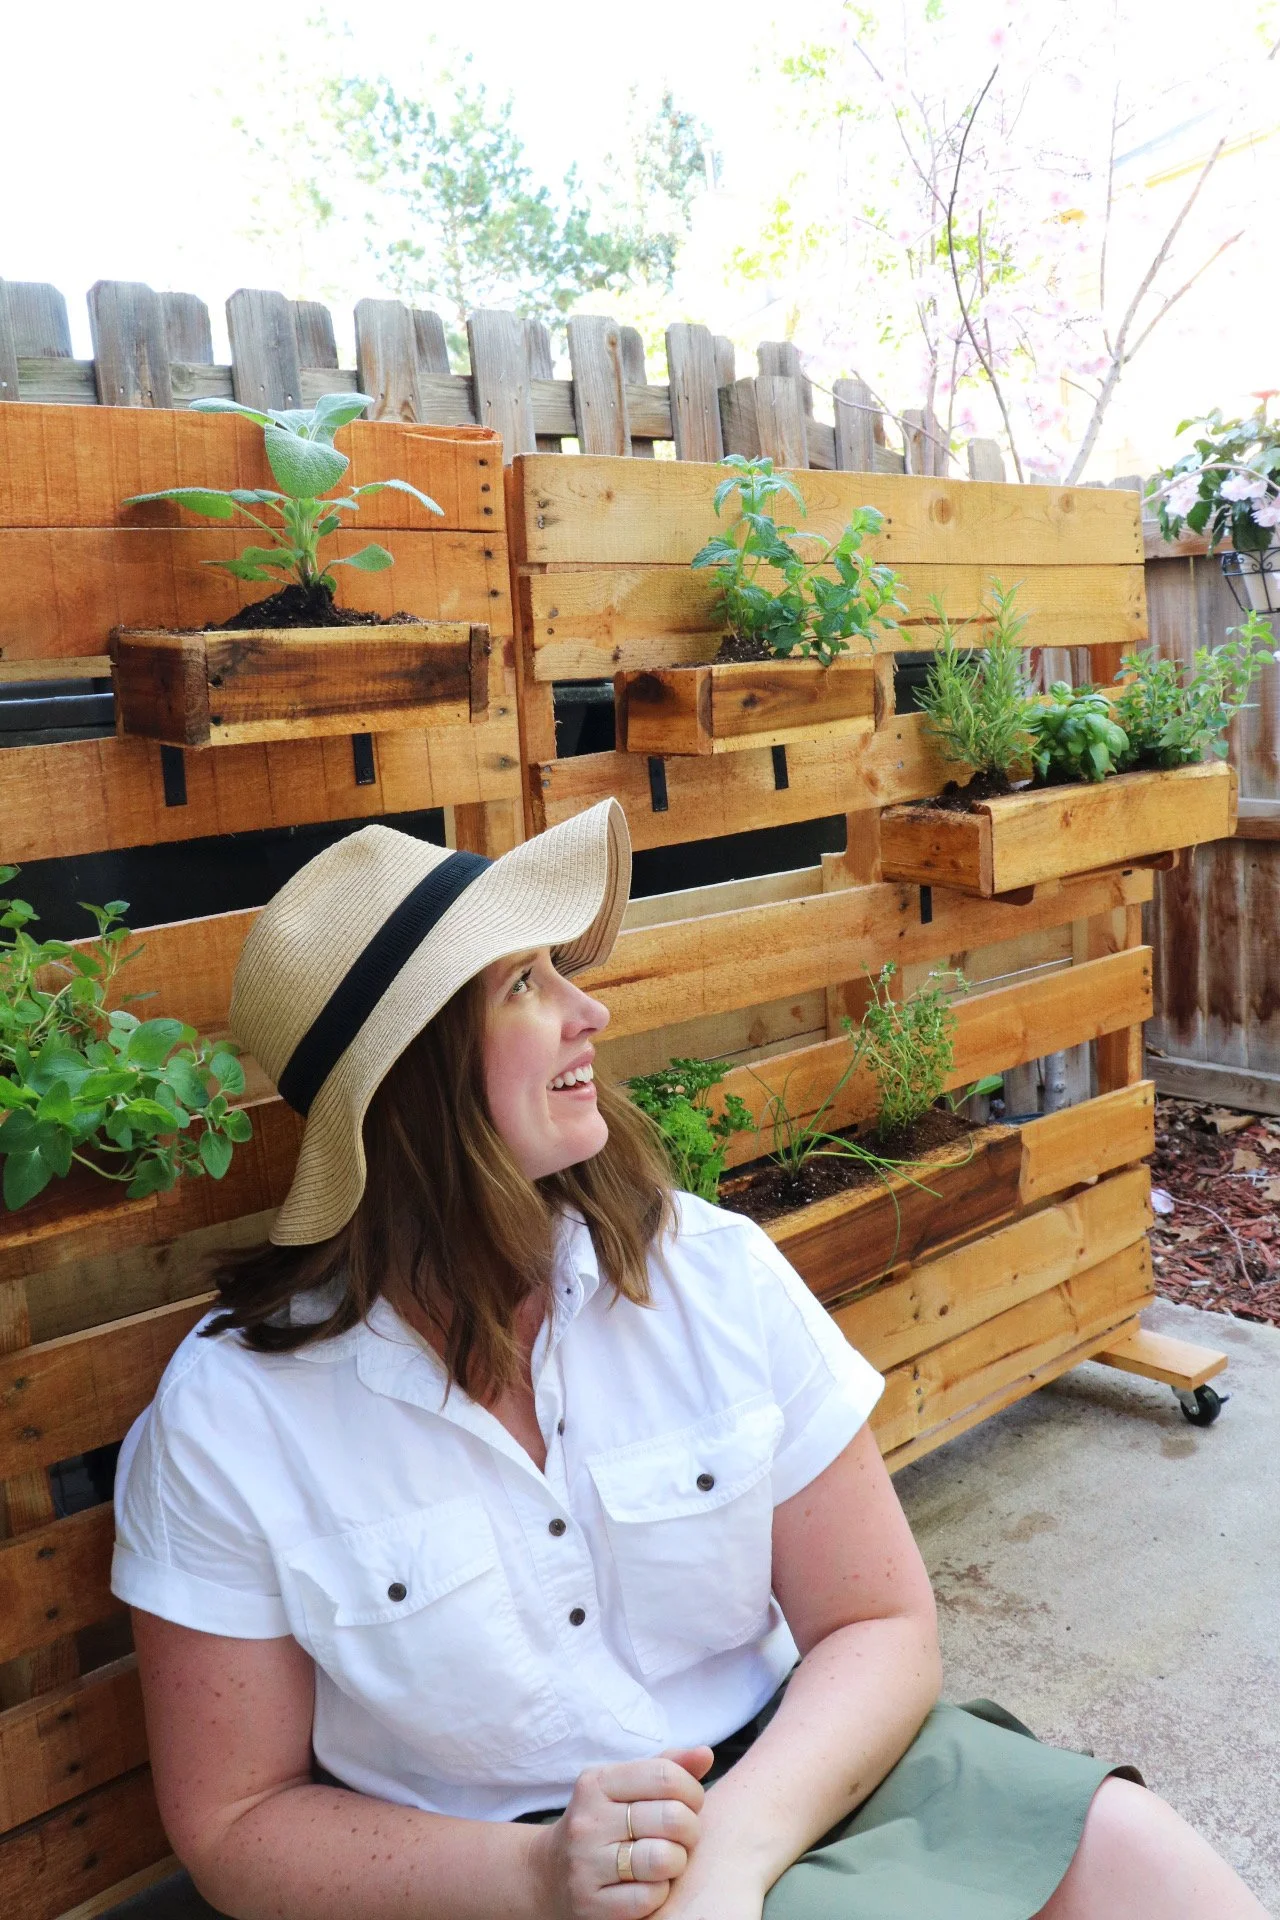
Cut pieces of landscape fabric to fit the inside of the planter boxes, and fill with potting soil to hold into place. Plant two to three herbs per planter box. In total, I had about three large planters, which held three herb plants apiece, and two small planters, which only held one herb plant. Sage and mint are notorious for being spreaders, so I gave them their own planter boxes.

There you have it! Remember to water every day, keeping the soil rich and moist (hate that word, but it’s accurately descriptive…) I’m obsessed with how this project turned out! It’s made the biggest difference both being out on the patio and the view looking outside from my living room. The first night after it was finished, we made mint juleps using fresh mint snipped straight from the garden. It was hilariously thrilling for me, and since then I’ve enjoyed seeking out recipes that use lots and lots of herbs so I have an excuse to go outside and utilize my garden.
The total cost for this project was about $50, which covered the herbs, hardware, and wood sealer. It covers the ugly trash cans, transforms the patio into a space we actually want to enjoy, and contributes to my day to day cooking. A total win-win-win.

Happy planting!