

Planter Box Filing Cabinet FLIP
I saw this flip on Instagram, originally by buildsbykristen. She took a basic, old metal filing cabinet and turned it into a cityscape planter box. At retail, those can run hundreds of dollars, but they are often the perfect space-filler across fences or along the edges of patios. After the success of my Vertical Herb Garden, I wanted to continue on my journey in making our backyard patio an enjoyable place to be.
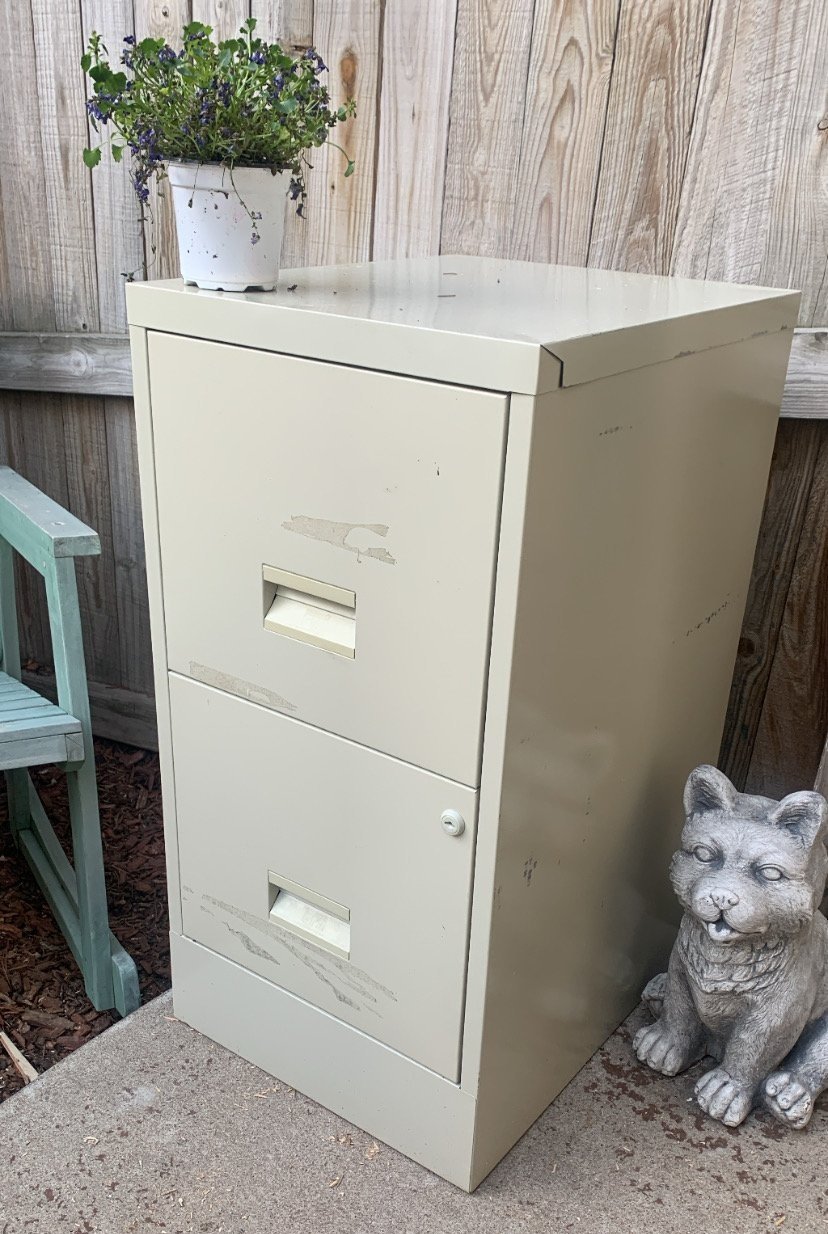
First step was acquiring a metal filing cabinet. A quick Facebook Marketplace search yielded dozens of results, and I ended up finding one for free.
Tada!!
Let me just take a moment to say this is my favorite type of DIY. I love taking old things and repurposing them to give a new life. It’s an eco-friendly way to update your home, and it’s always satisfying to see the before and after.
Anyways. Moving on.
Materials:
Rust-Oleum Textured Spray
Rust-Oleum High Performance Enamel Spray
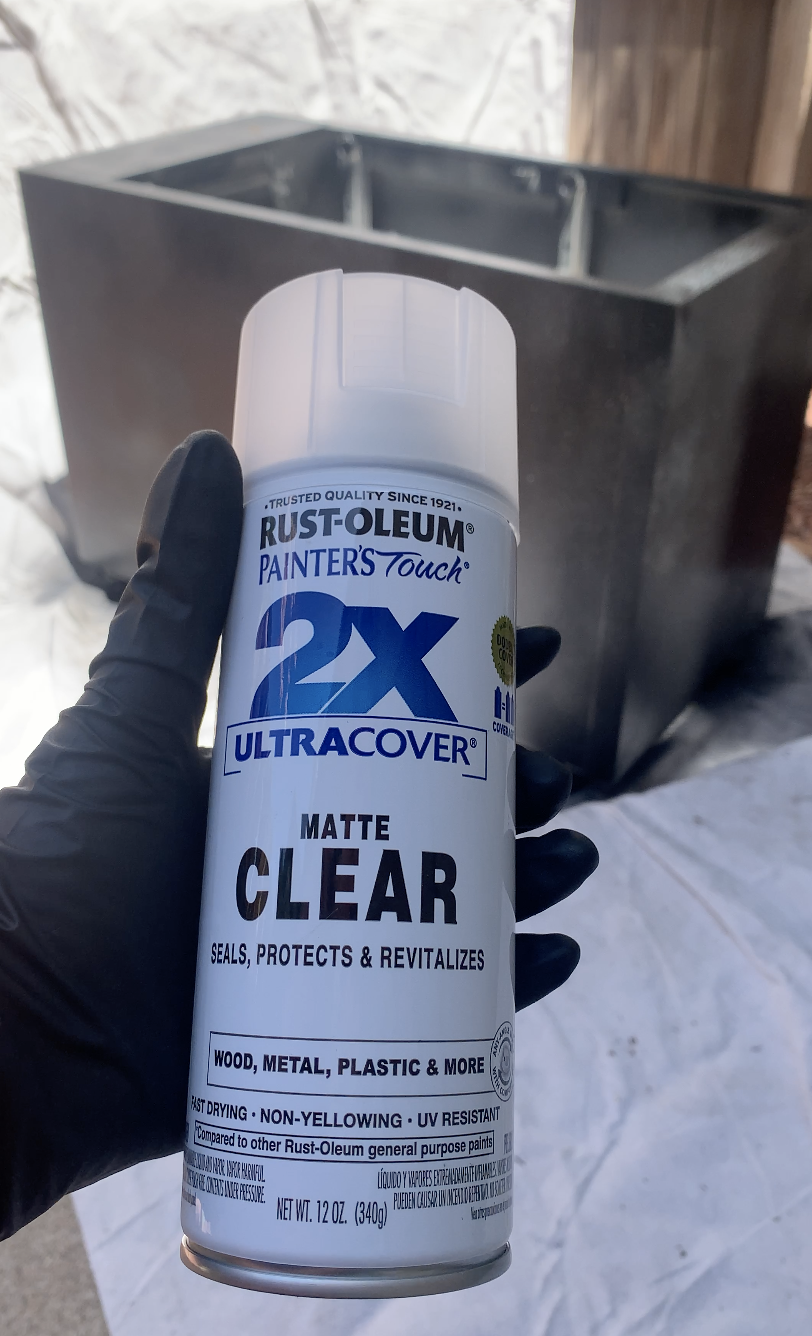
Rust-Oleum Protective Enamel Clear Matte Spray
4 Swivel Locking Casters
Self-drilling sheet screws
Needle nose pliers
Construction adhesive
Electric drill
Bubble wrap
Soil
Plants (I used Little Rocket Ligularia)
Disclosure: My content is reader-supported, which means that when you purchase through links on my site, I may earn an affiliate commission. Learn more here.


Step 1:
Remove the drawers and flip upside down. Use needle nose pliers to remove the bottom sheet of metal from both drawers. Toss the remainder of the drawer aside (you won’t need it moving forward).
Attach the metal sheets to the open bottom of the filing cabinet using construction adhesive. Let dry for about 30 minutes.
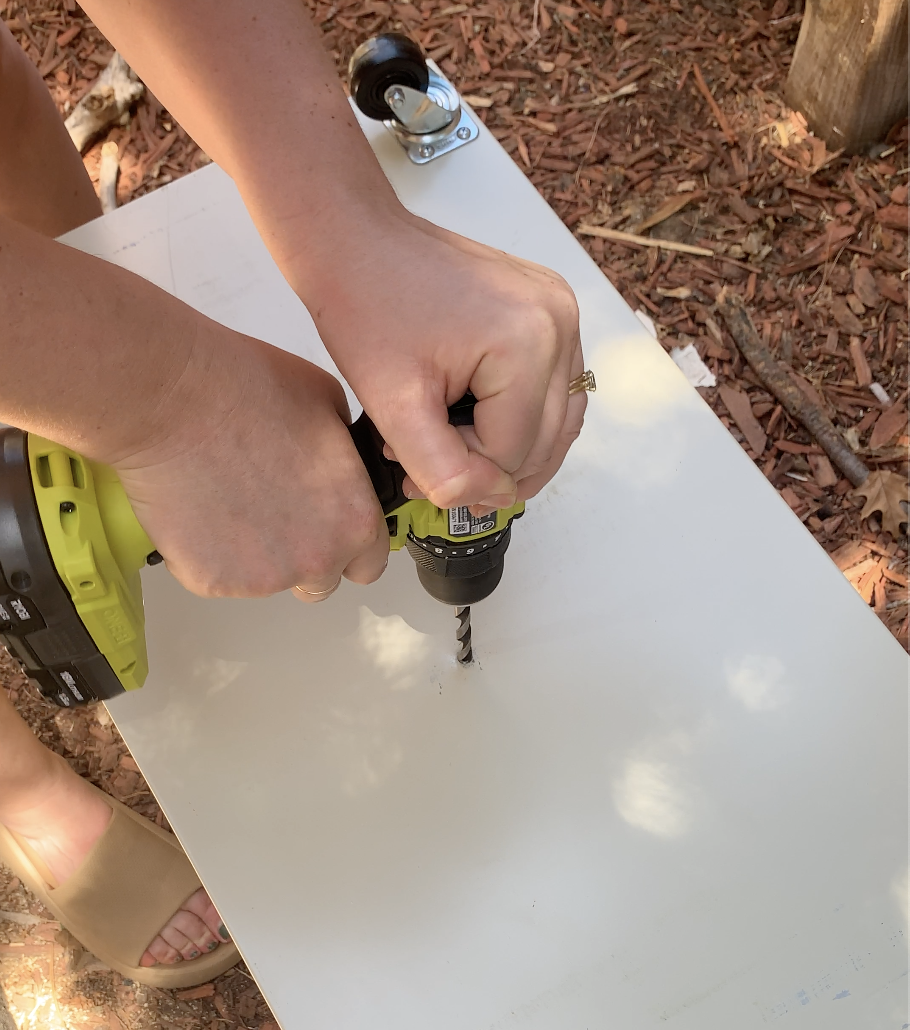
Step 2:
Flip the whole filing cabinet over and attach the four locking swivel casters to the corners, using self-drilling sheet screws and your electric drill.
Then, drill three or four drainage holes in the bottom-middle of the cabinet, using a large drill bit.
Step 3:
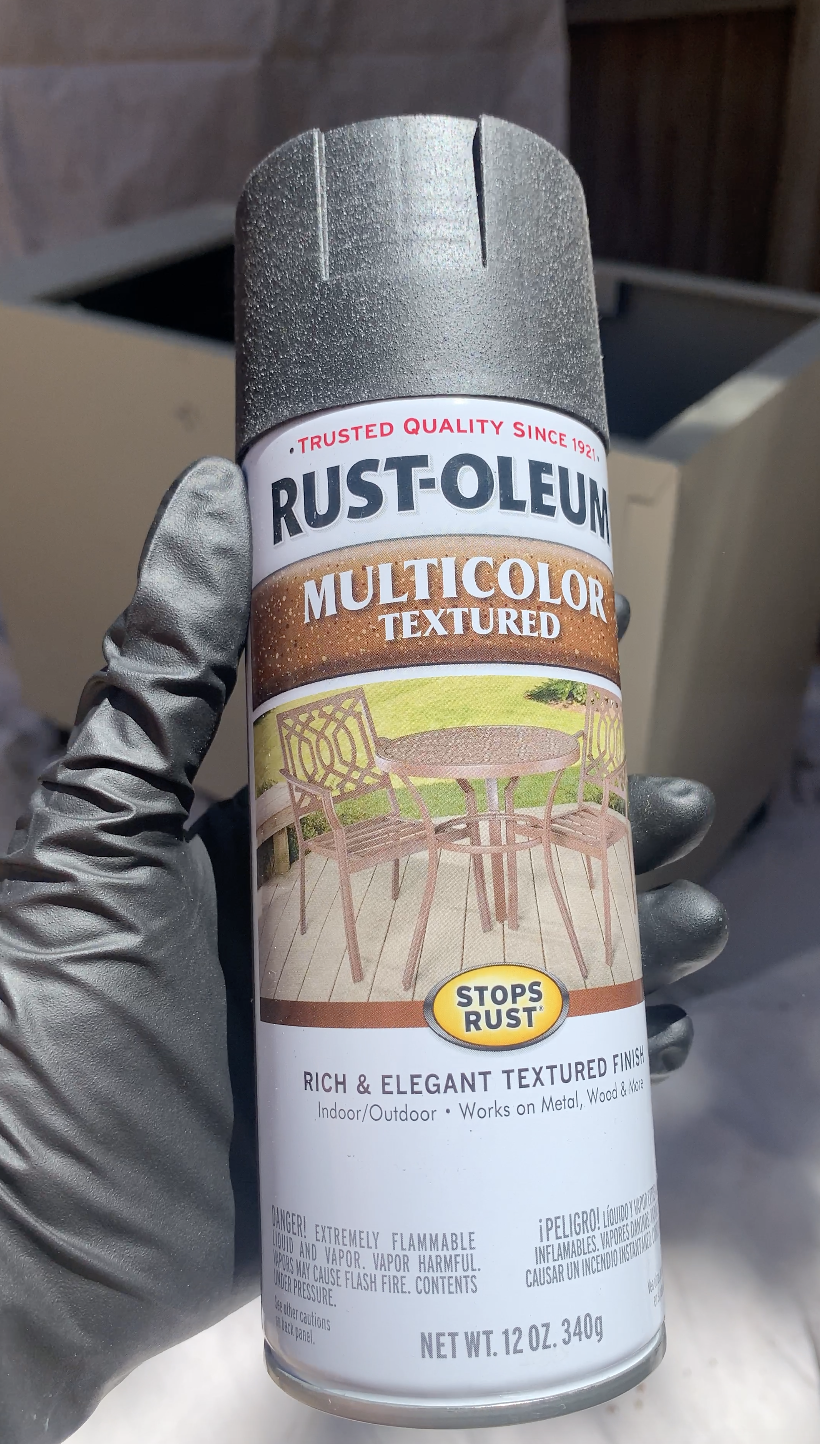
Flip the filing cabinet back over, wheels side down. Cover the entire outside with a coat of Rust-Oleum textured spray. It doesn’t really matter what color you use - I used brown - it just helps stop rust. Let it dry.
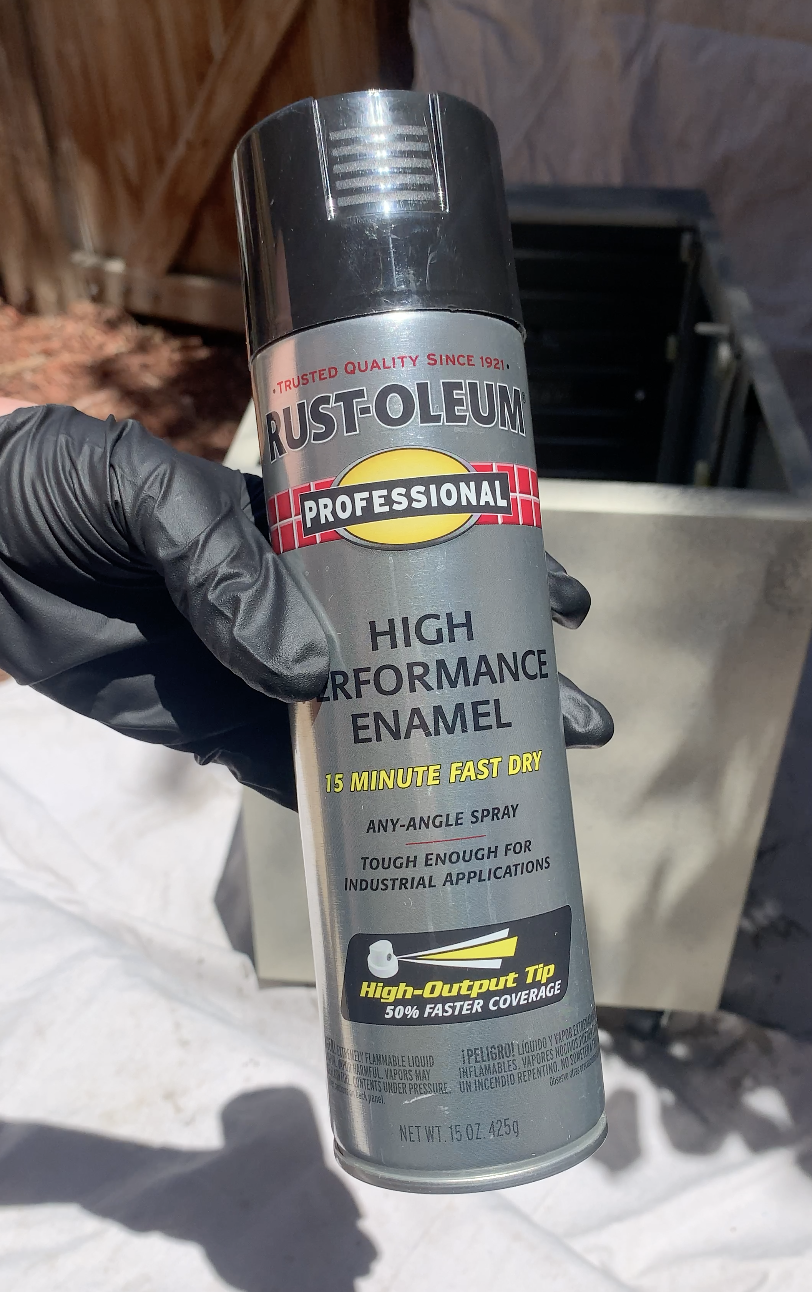
Next, spray two coats of Rust-Oleum high performance enamel in black. It dries extremely quickly, which is great so you don’t have to wait too long in between coats.
Last, spray a coat of Rust-Oleum protective enamel clear matte. This gives a smooth, matte finish, helping achieve the overall cityscape planter box vibe. Let it dry.


Step 4:
Line the inside of the planter with bubble wrap. This will protect the plants from the hot heat in the summer and the cold chill in the winter (you don’t want your plants to die from heat or cold!) I added the planter pots to help fill up a bit of the planter. And then filled the rest with potting soil.
Plant your plants! I used two Little Rocket Ligularia, which I liked because of the height they gave the space and the bright yellow flowers they produce when in bloom. HOWEVER. I would NOT recommend these plants. A few days after planting, I noticed a significant number of FLIES in our backyard… come to find out, ligularia is known to attract flies. There would literally be a swarm of 15 or so flies every morning when I went out to water… It was nasty. Let’s just say I was not sad when these plants died. I’ve since replaced with pampas grass.
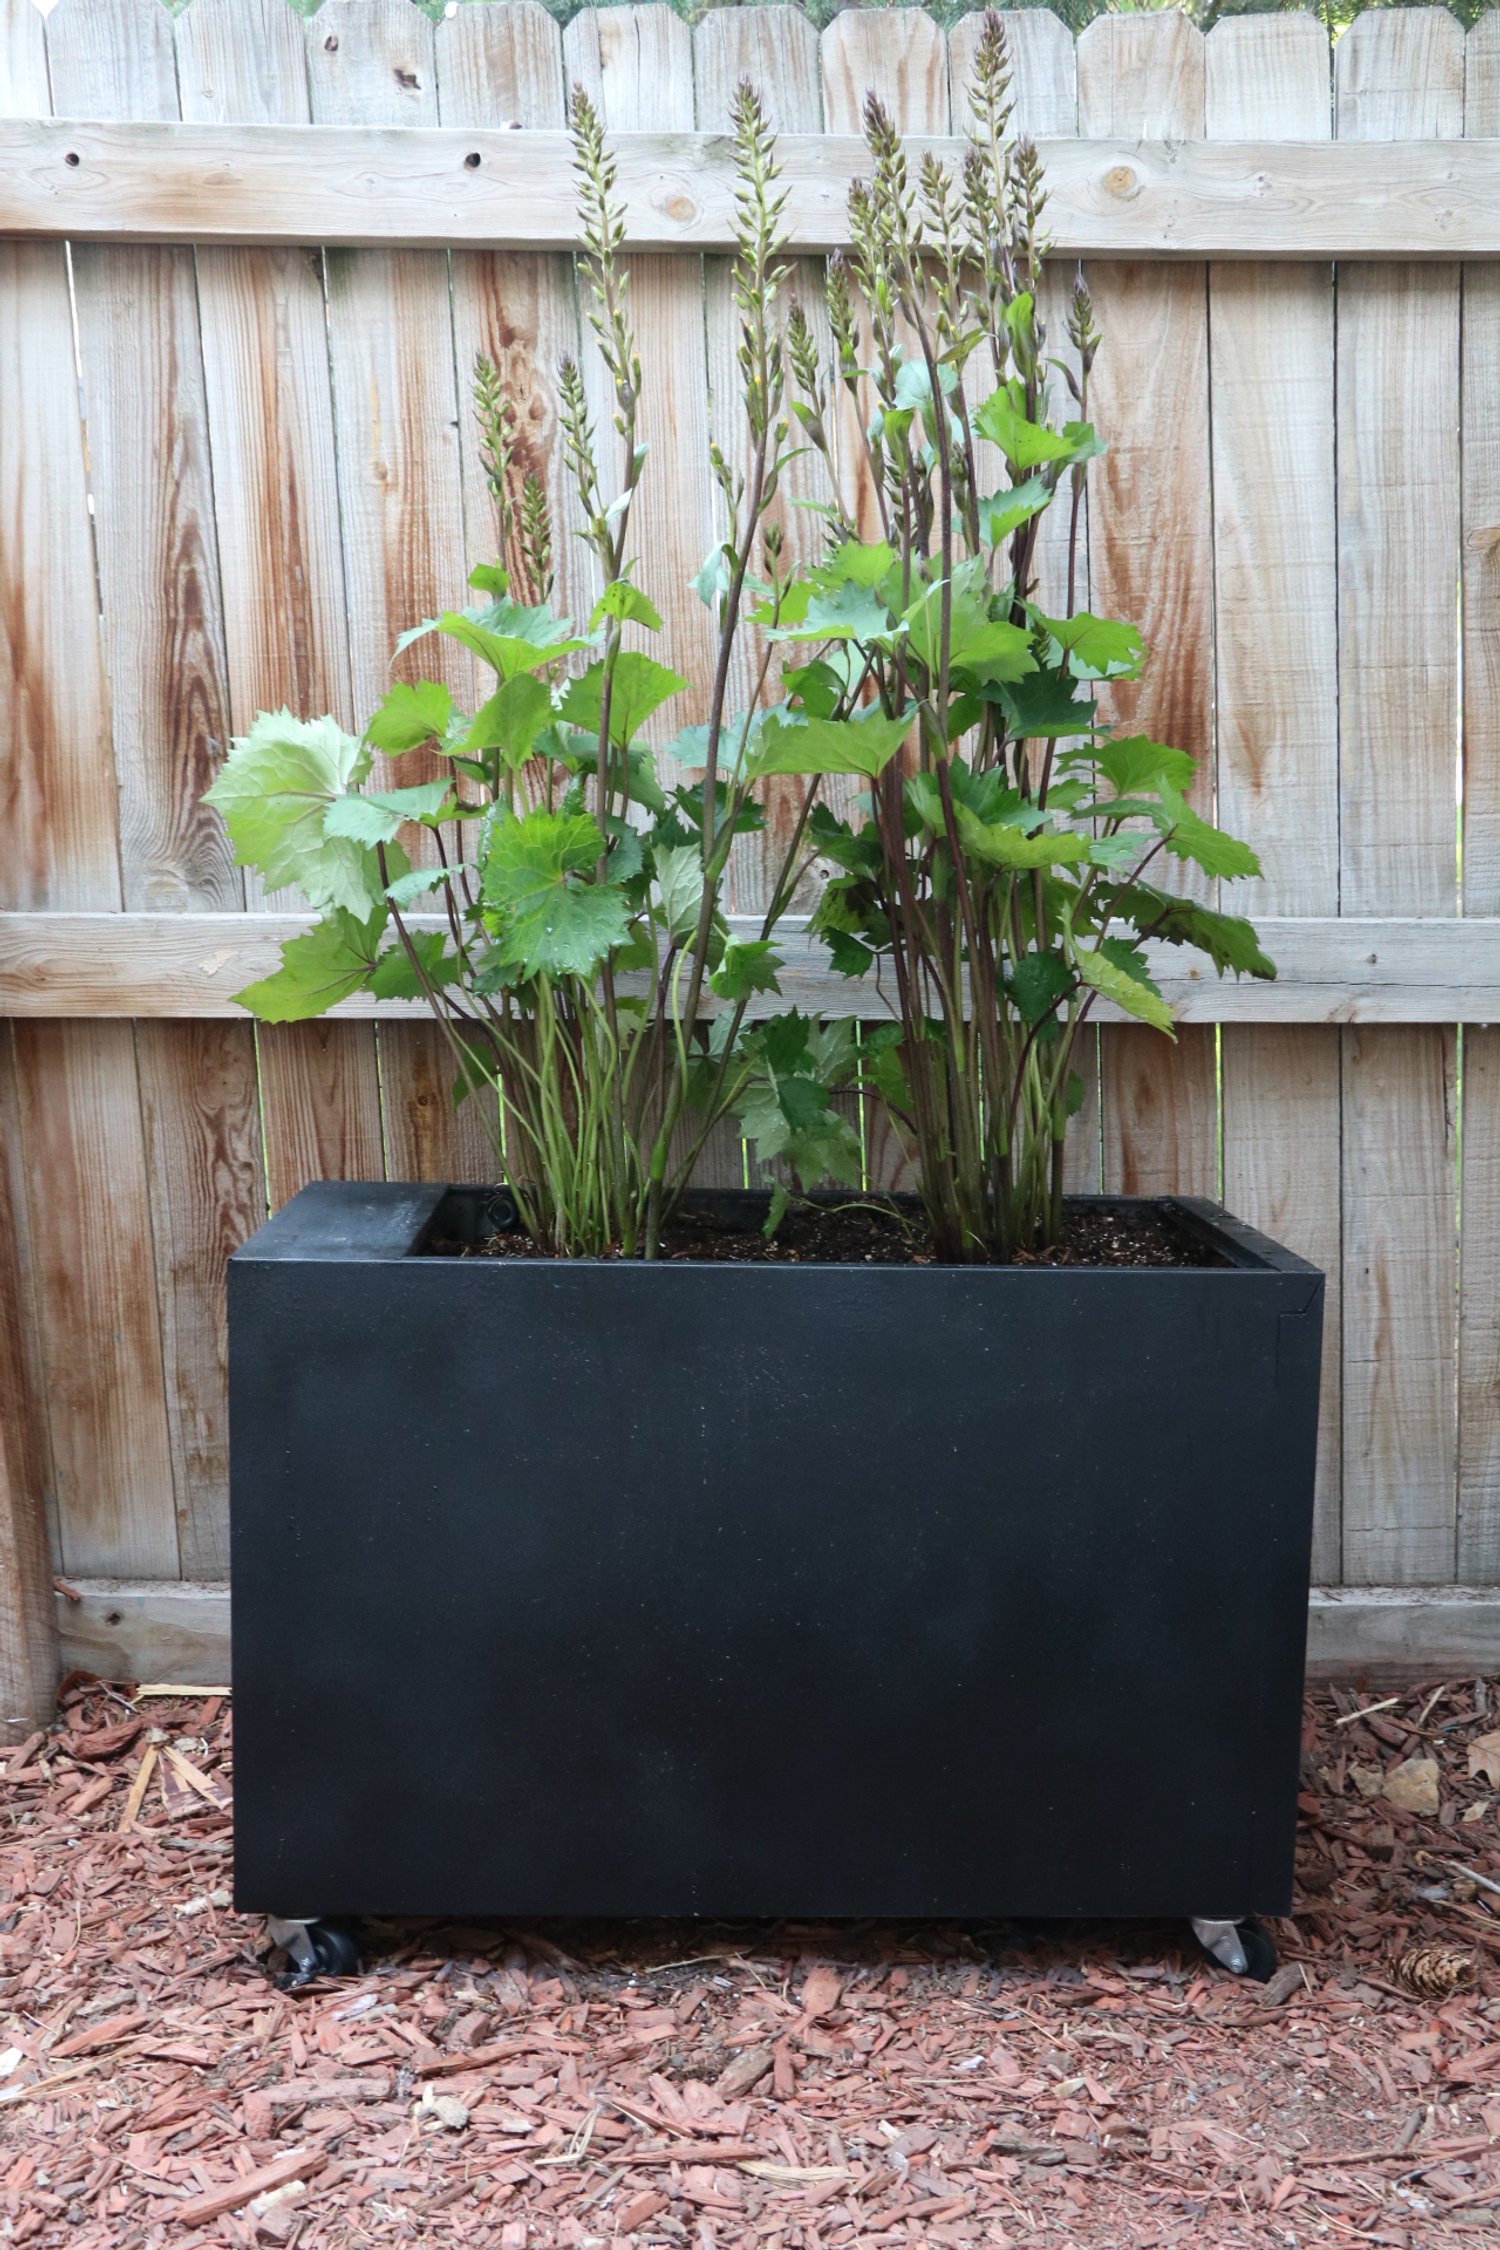

Overall I am SO happy with my new planter box!! I love how it fills the space along the fence and adds greenery to the brown. It’s sleek and modern and the total cost was around $80, including the plants and materials. Despite my issues with the ligularia post-project, the planter box itself was a total success. I could image this project with much bigger filing cabinets as well - just add additional casters for support. It’s amazing how much of a difference a few plants make. We have been enjoying our patio all summer long!


