Easy Wooden Headboard
I've been feeling a little ADD with my home decor lately. I'm so inspired by other blogs or Instagram accounts that I wish I could change everything all at once! Here comes reality - redecorating costs money. Money that should be used responsibly and not on $75 pillows (damn you mother and the excellent [read: expensive] taste you gave me!!) But sometimes there's just an itch you've got to scratch.
In comes this amazing DIY that looks fantastic but cost less than $100 TOTAL. Yes, you read that correctly. I not only love the look of my new bedroom, but my bank account is breathing a deep sigh of relief. You'll love how easy this DIY is!

First things first, I must give a shout-out to Pinterest, which lead me to Primitive Star Quilt Shop and their fabulously simple DIY instructions. My actual headboard doesn't vary much from the one they did, but the finished decoration looks pretty different.

BEFORE (+ idea scribbles)
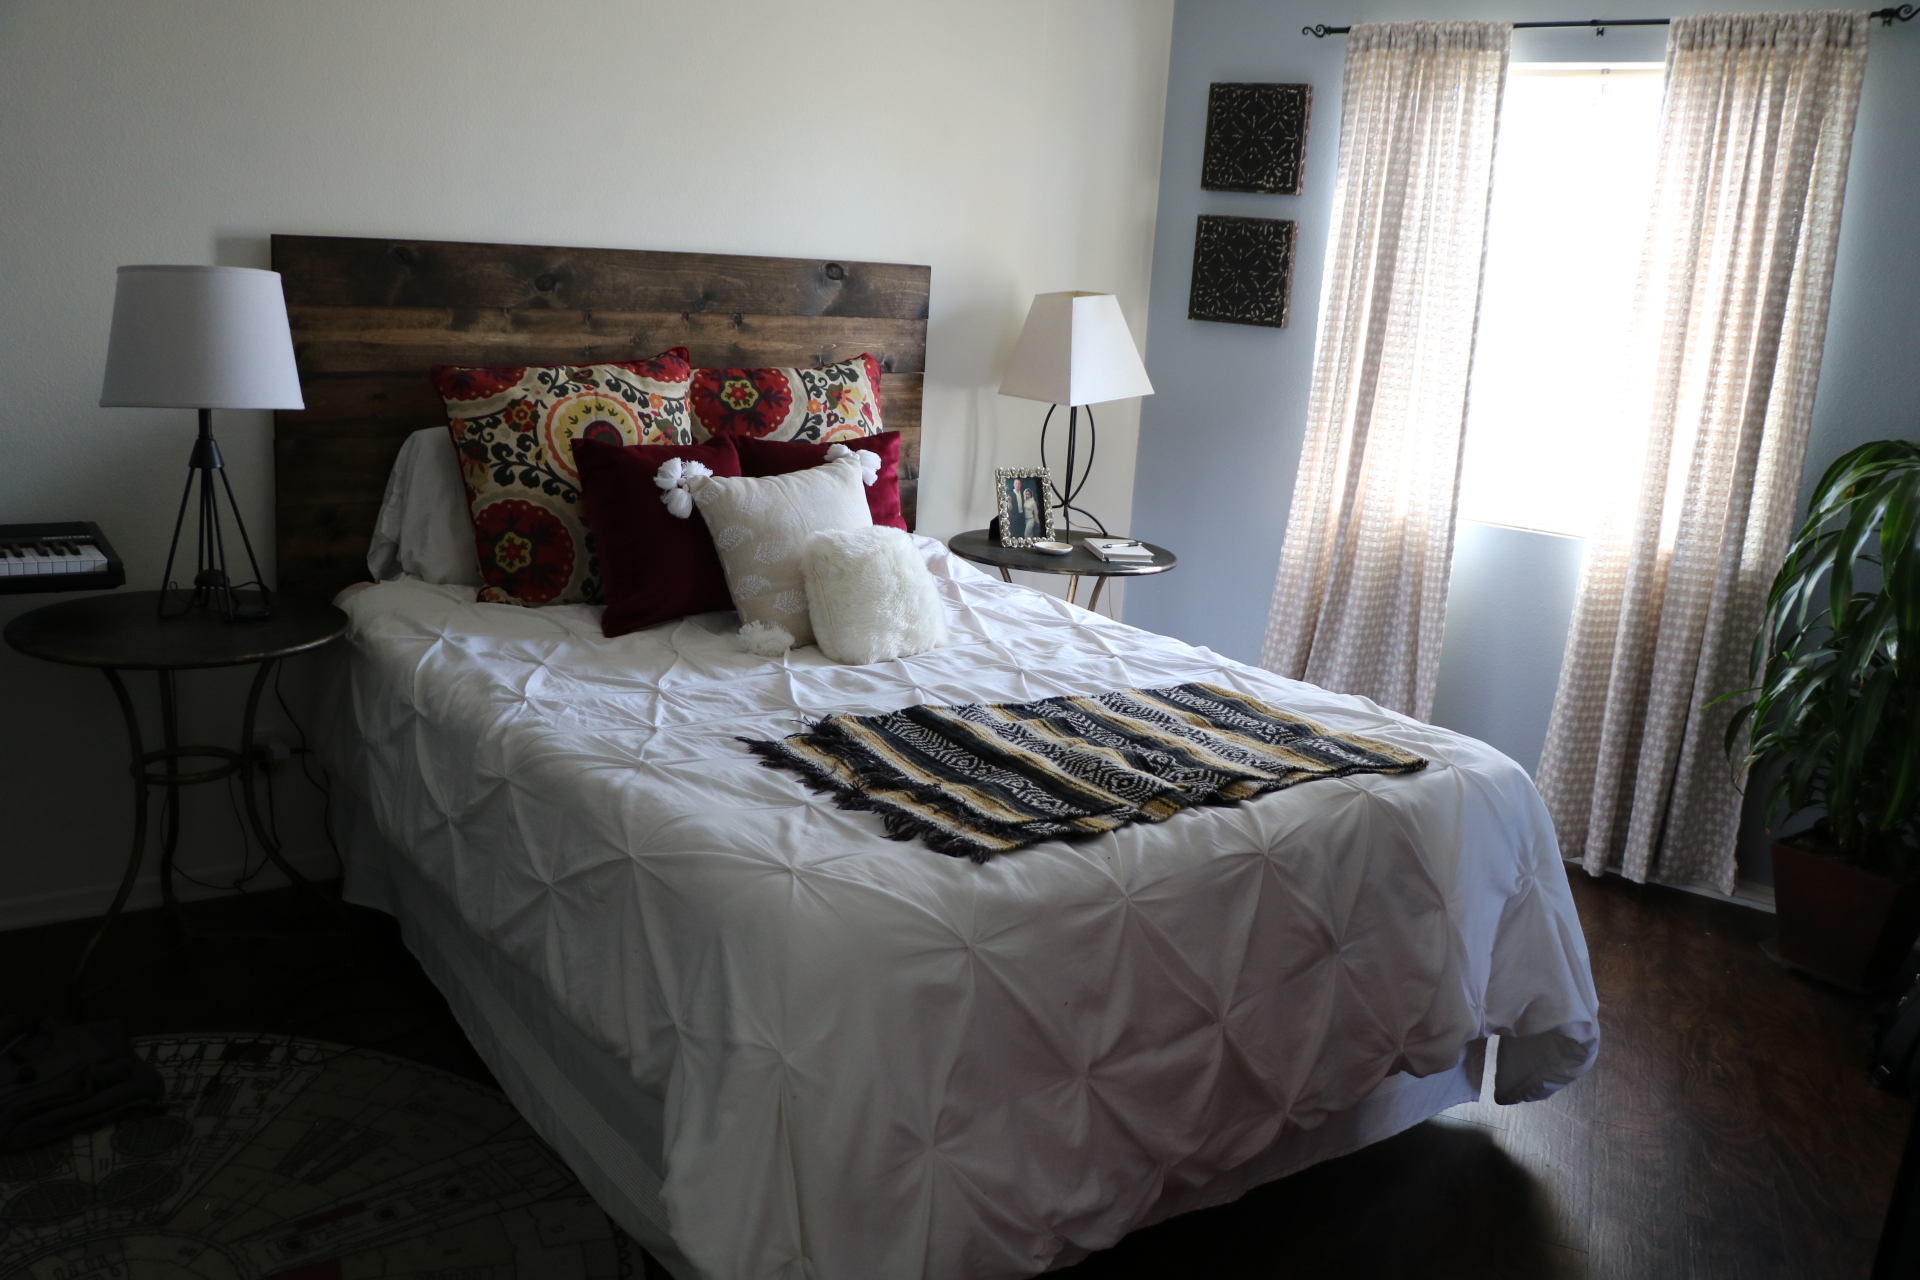
AFTER
As you can see, my headboard evolution went as follows: when we first moved in, I painted the dark grey strip, which served as a headboard substitute. Then about a year ago, I made the cloth nail head trim headboard, which I really liked individually but if I'm being honest, I never quite liked the effect on the rest of the room decor. Something just felt off... this led to my Easy Wooden Headboard! First I painted the walls back to white (shade: Swiss coffee), taking legit three coats of paint to fully cover the dark grey. And then I was off to Lowe's for wood!
One of the hardest parts about apartment living is a lack of garage/work space. There's no where to fit or use a power saw, which really limits the types of wooden headboards you can make yourself (nothing with intricate or circular cuts because, hi, I don't own those types of saws). I needed to find a DIY that used very basic wood cuts. Life hack = the lovely workers at Lowe's will cut your wood for you. **remember to buy a drop-cloth to work on top of when working both indoors AND outdoors**

Lumber for Queen Sized Bed:
six 1x6's at 66"
two 1x4's at 52" (vertical supports)
one 1x3 at 56" (horizontal base support)
one 1x3 at 25" (small vertical support)
We got "whitewood", which is inexpensive and, after sanding, soaks in the stain exceptionally well. Make sure you pick out pieces of wood with little to no warping - they need to be straight in order to fit together well!
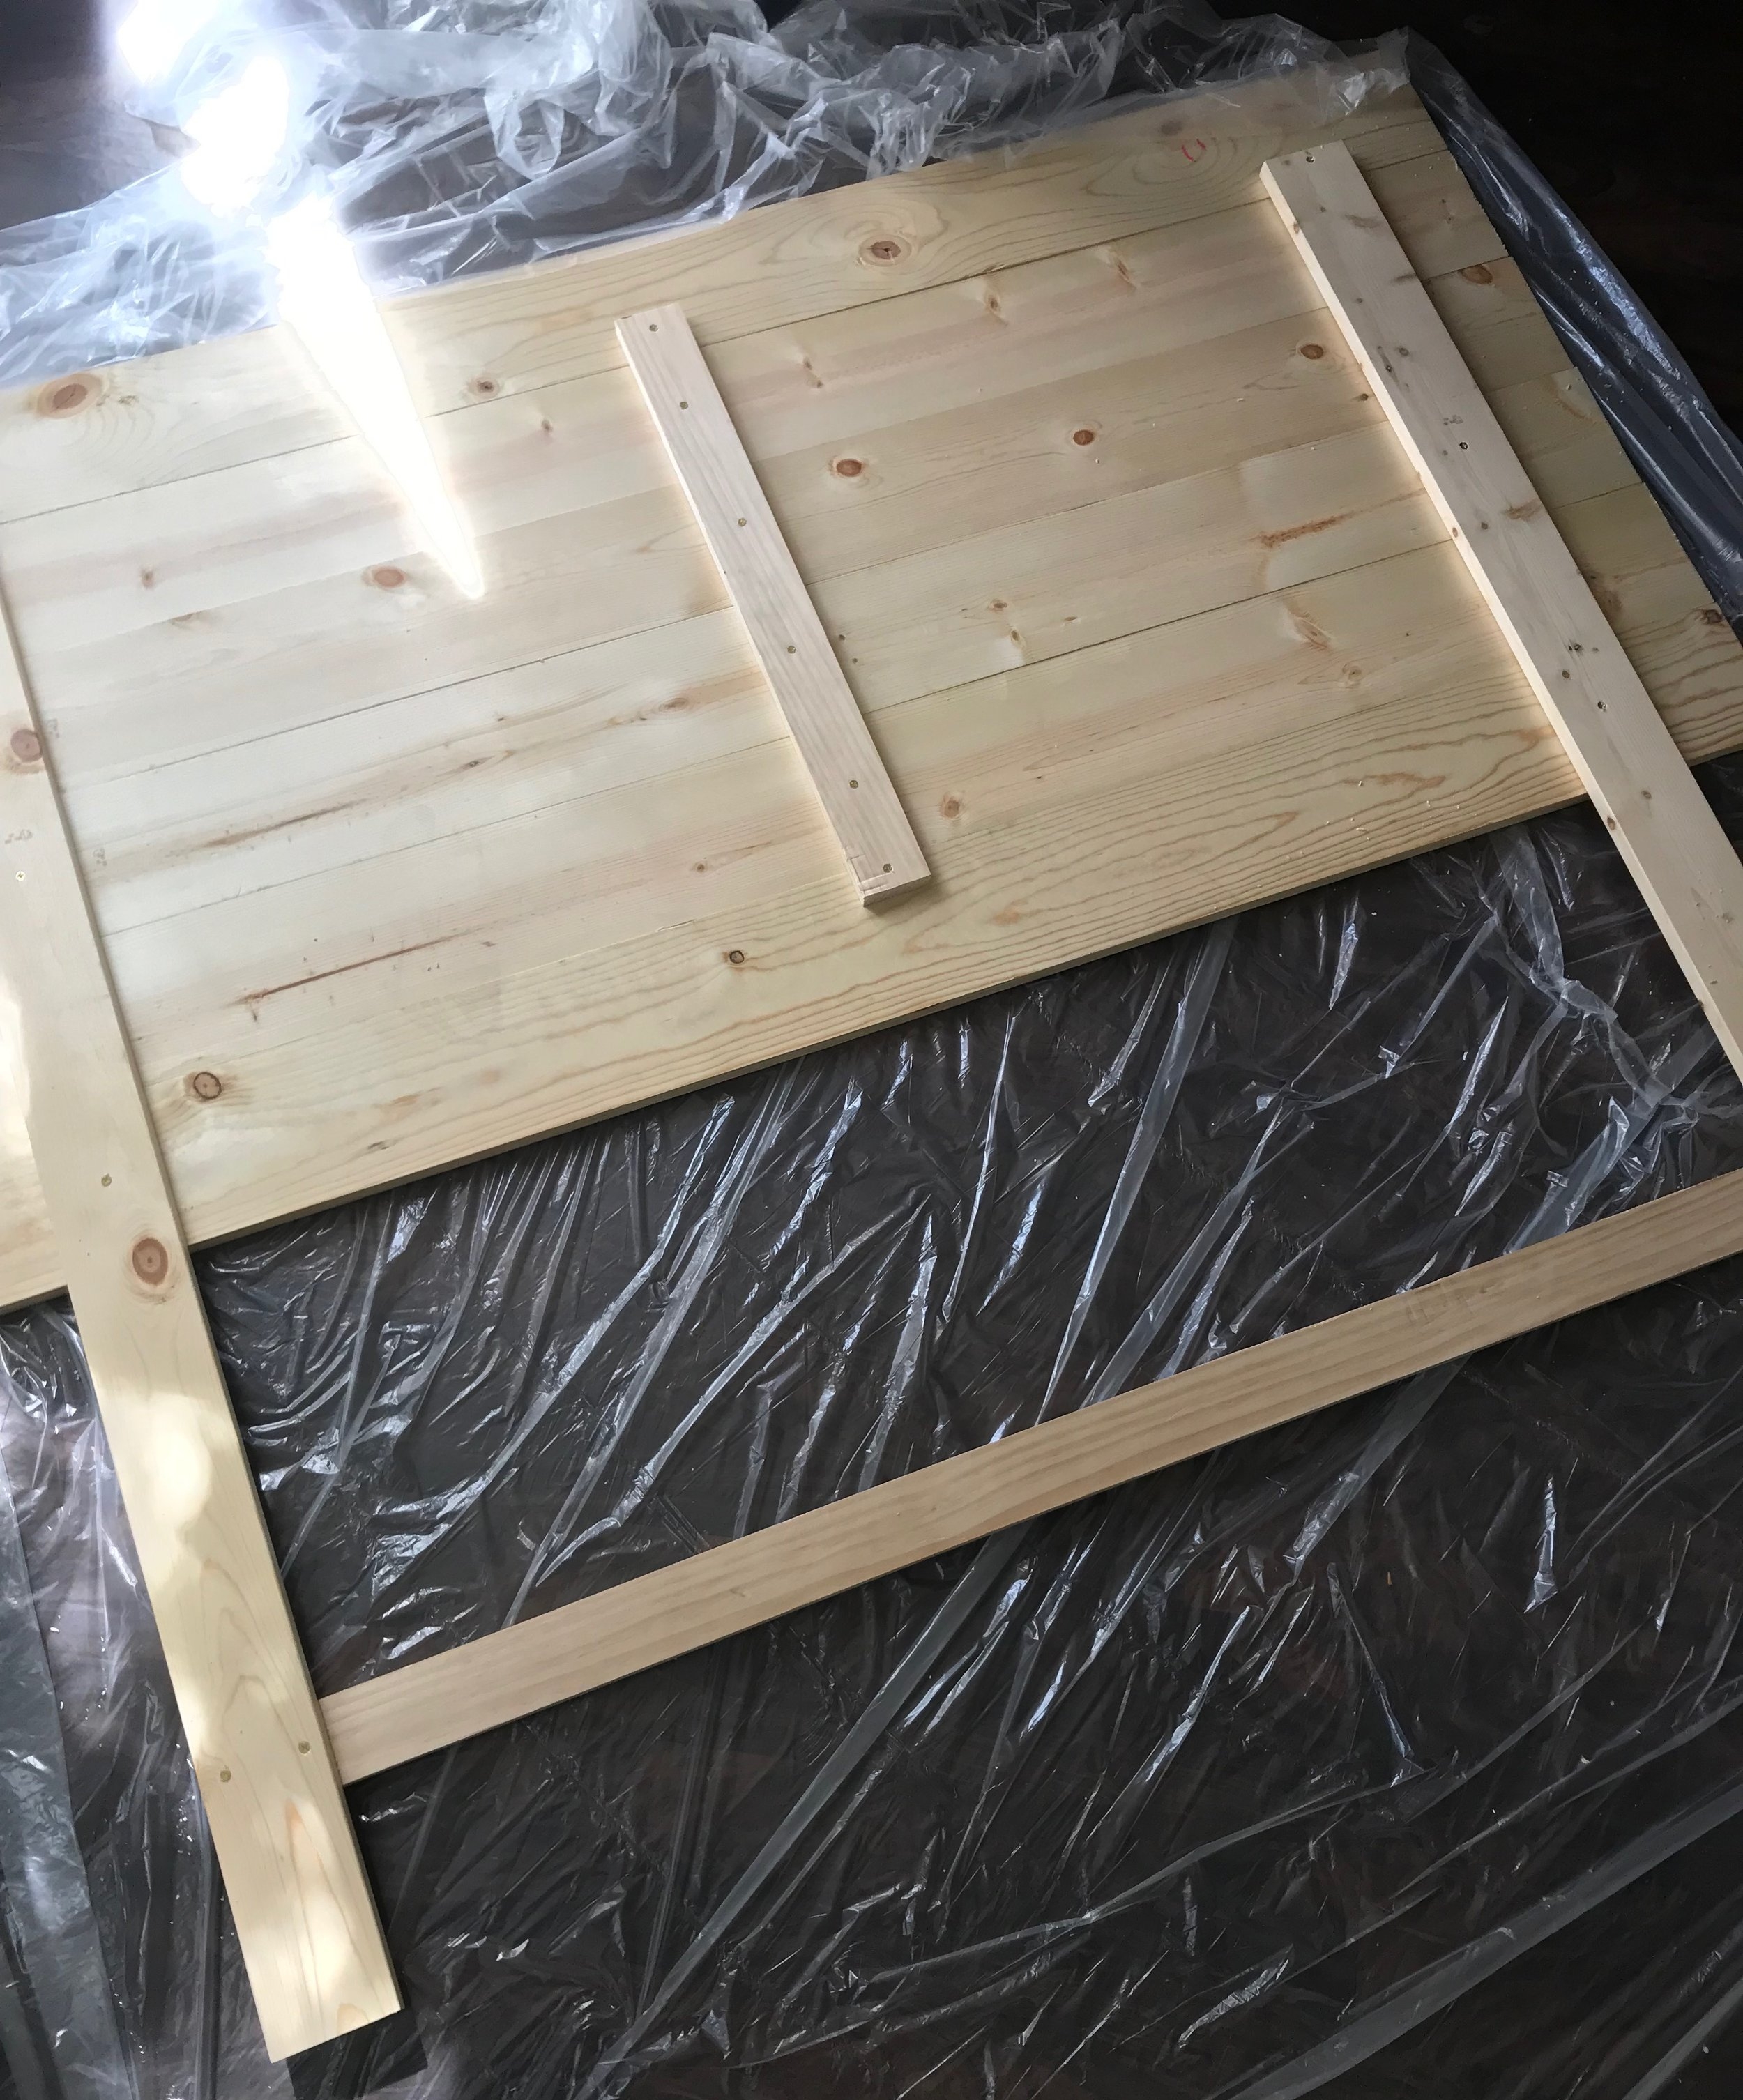
First, lay the six 1x6's out as evenly as possible. Then, lay the 25" 1x3 down the center. Using 1 1/4" screws and a drill, attach the vertical support. I would recommend getting a friend to help with the drilling, as it ensures straightness and uniformity. Those are my boyfriend's hands - mine didn't suddenly get all big and manly.


Next, attach the two 1x4 52" vertical supports, using 56" horizontal base support as your guide for how far apart to space them. Also, use a level and measuring tape to evenly attach them so your headboard isn't crooked!
Flip this bad boy over and now it's time for sanding! This step is crucial not only to make the wood soft and even (no splinters for me, please!) but it also allows the wood stain to soak in and give you that rich color. I kind of half-assed the sanding for the legs, as I knew they wouldn't really be showing, and boy, you could tell a difference in color when I moved on to staining.

This sander was only $24 from Lowe's AND it collects the dust as you go, so less mess!! Can you see my dining room table pushed up against the wall?? I wasn't kidding when I said I have little to no room for projects... but does that stop me? NEVER!!


I was in love with how this color turned out!! You can see my eyes sparking underneath my face mask. I was in pure heaven while staining. It's so exciting to start to see your project come to life in such a great way!
In case you've never worked with wood stain before (which was my case!) here's some tips:
Have an old, but clean rag on hand. You can just deem this your "staining rag" and it will live on for all your future staining needs to come. Also please remember to wear gloves of some kind. This stuff is literally designed to STAIN, and no one want their hands to permanently look like you messed around with some hard-core self tanner.
Brush or sponge the stain on, using long broad strokes. A little bit goes a long way. I wanted the color to be really rich so I set a timer for 5 minutes to let the stain soak the wood. Then, using your cloth, brush the excess stain off. Continue until you've covered the entire surface area. Remember - you want the tops and sides of the headboard to be stained too!
I personally didn't feel the need to stain the back, but you could add this step after the front completely dries. Same goes for the legs + support. Won't exactly show once it's installed, but I went ahead and stained them anyways, just to be safe.
Relative to how large the can is, I barely used any stain. You could definitely get away with buying a mini can. I'm keeping mine around, which perhaps will inspire my next DIY...
You're gonna want to give this over 24-hours of drying time. It dries to the touch quicker than that, but the smell lingers for much longer.

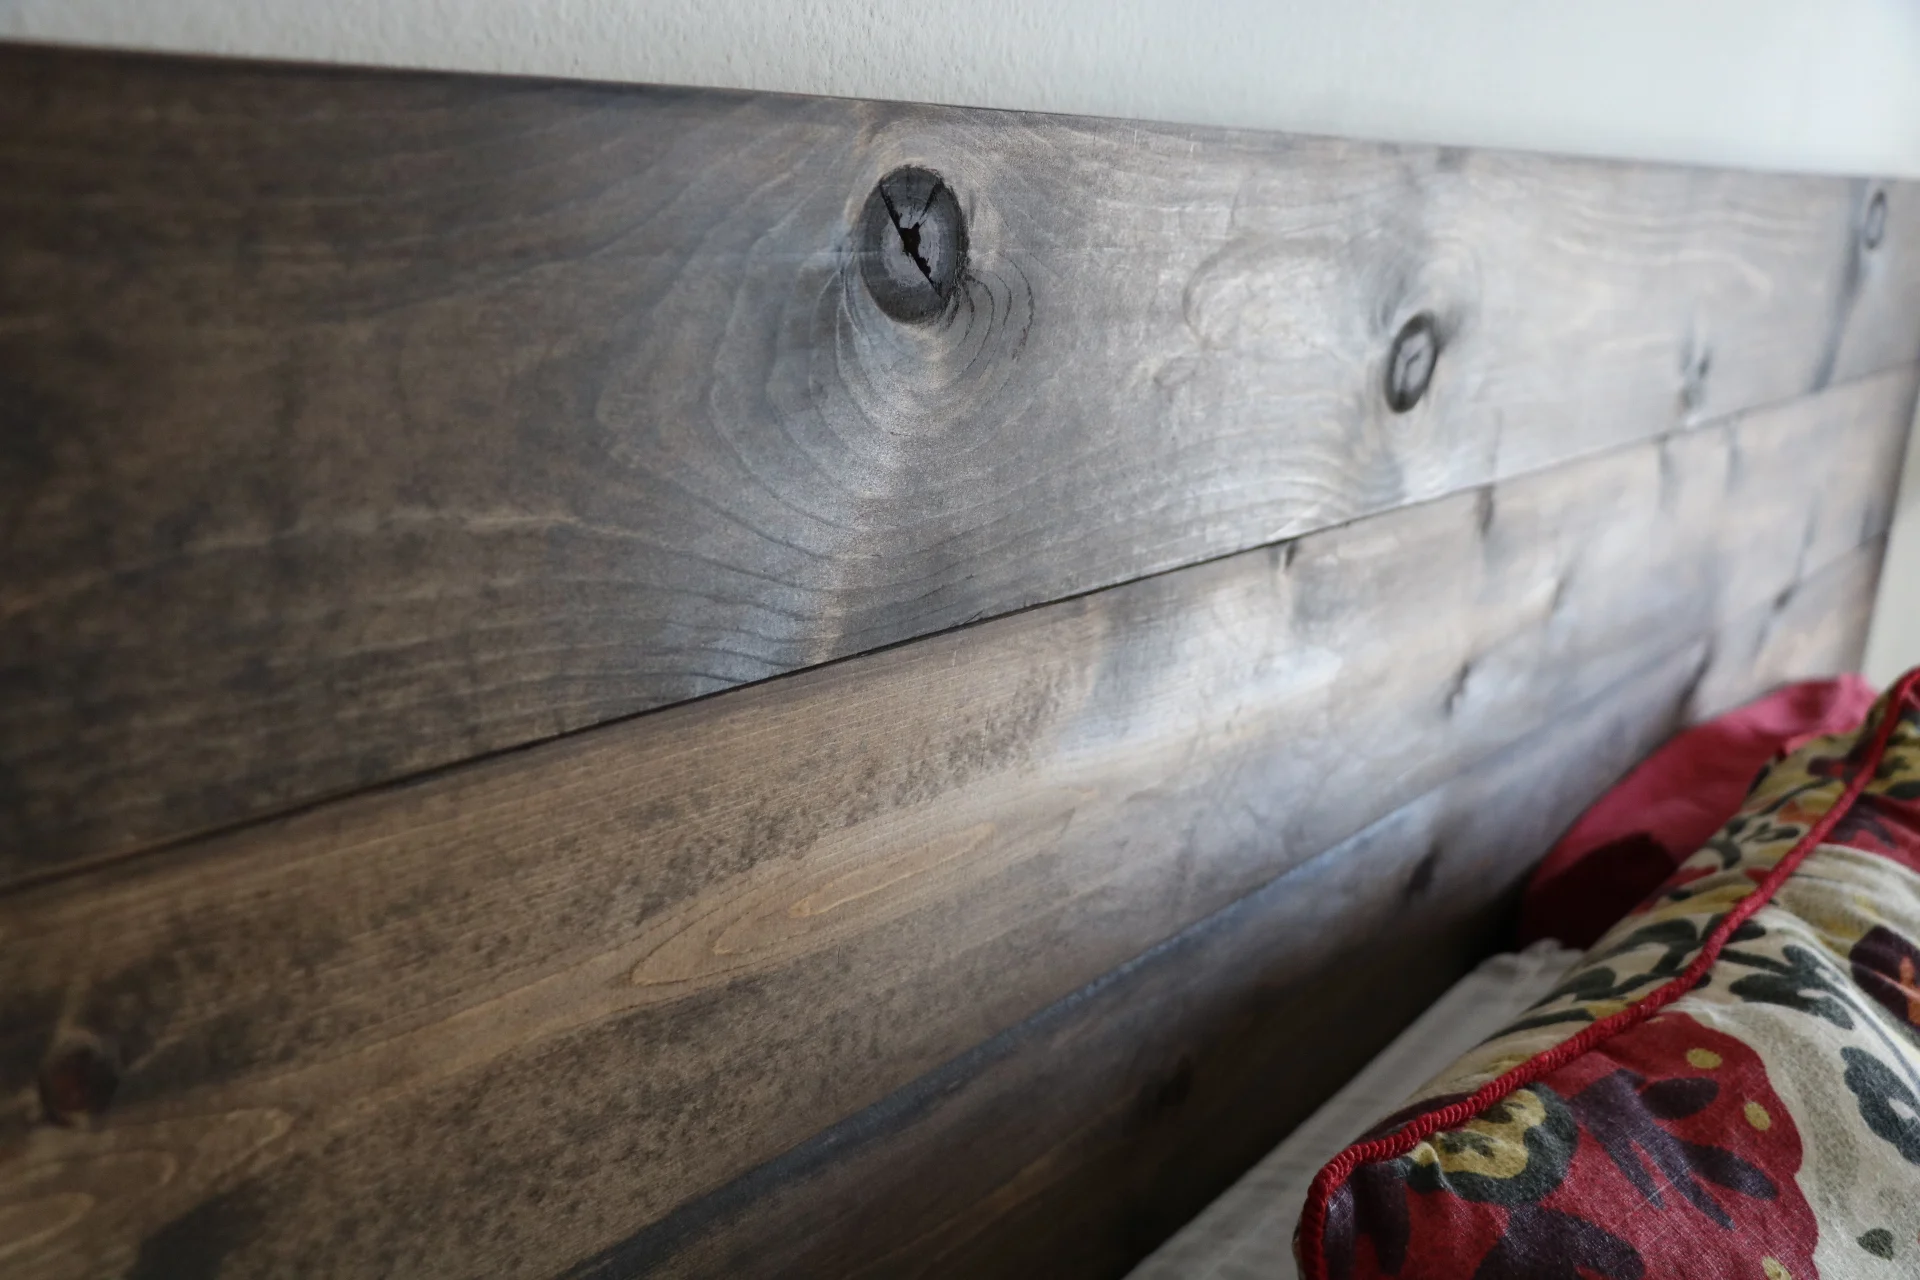
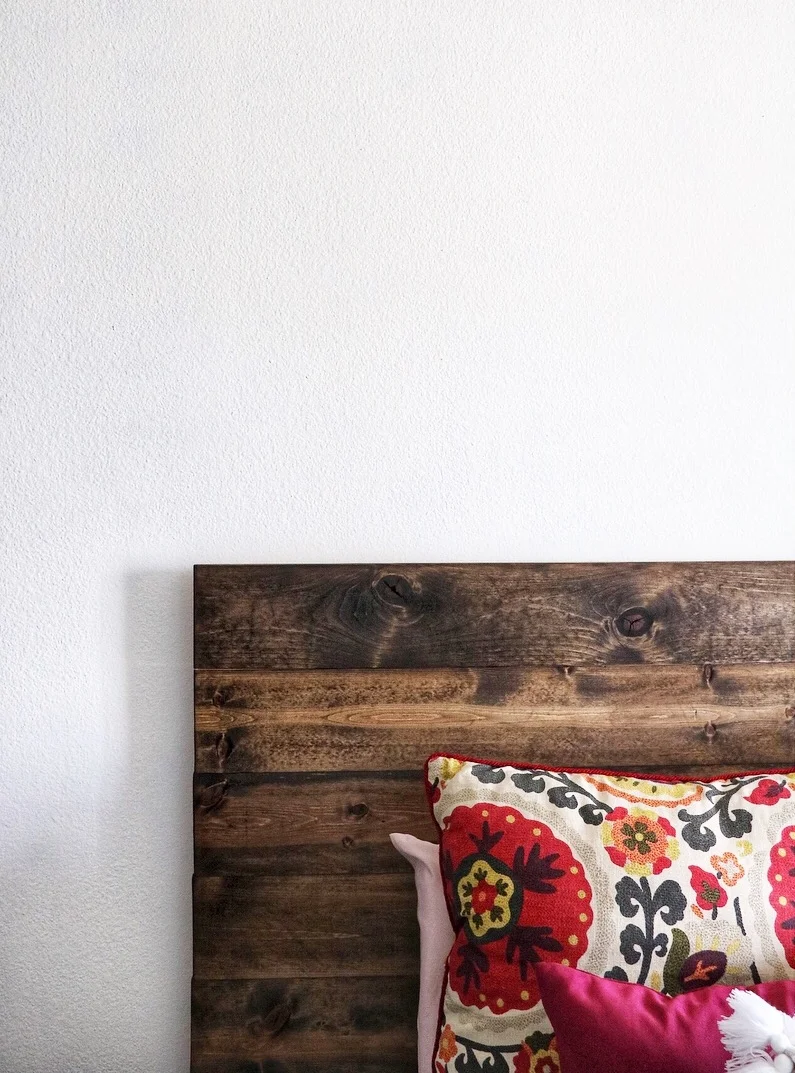
The final product!! Isn't that stain just gorgeous? It looks like it cost so much more money - which is my favorite kind of DIY. Do you have what it takes to make your own? (The answer is yes, duh, anyone can do this) Please comment and let me know how your headboard turned out!