Wedding Bouquet Preservation
Besides marrying Humberto, the decorative element I was most looking forward to for the wedding were the flowers. Call me a romantic, but something about a beautifully arranged bouquet just takes me breath away. We are still awaiting our official wedding photos and I’m eagerly anticipating drooling over the blooms all over again. Our florist was fantastic - if you need someone creative and innovative in the Denver-Colorado area, check out Blush + Bay. Laura is great to work with, and I loved how all our flowers turned out!
That being said, flowers inevitably die. Sad. I embarked on a journey to find the best way to preserve my bridal bouquet. I’d had luck with pressed flowers, honing my technique with projects like Easy Pressed Flowers Art but I didn’t think that would work with my bouquet for a few reasons. My wedding flowers were a mix of peonies, ranunculus, and garden roses - all in shades of pinks, marigolds, and white (still swooning). None of these blooms are particularly great for pressing, especially the peonies, because of the general size and shape. Pressed flowers work best with flowers that are flat. None of mine were.
After a bit of research, I learned about drying flowers using silica gel. The benefits seemed to be that the flowers retained their shape and color. I figured it was worth a shot (not gonna lie - it was nerve wracking knowing I was attempting a new DIY technique on my wedding flowers! I only had one shot! It felt like the stakes were extremely high…)
The good news… it totally worked!! I am over the moon at how this project turned out. Read on to learn how to preserve your own bouquet.

Here’s what you’ll need:
Flowers (cut fairly close to the stem)
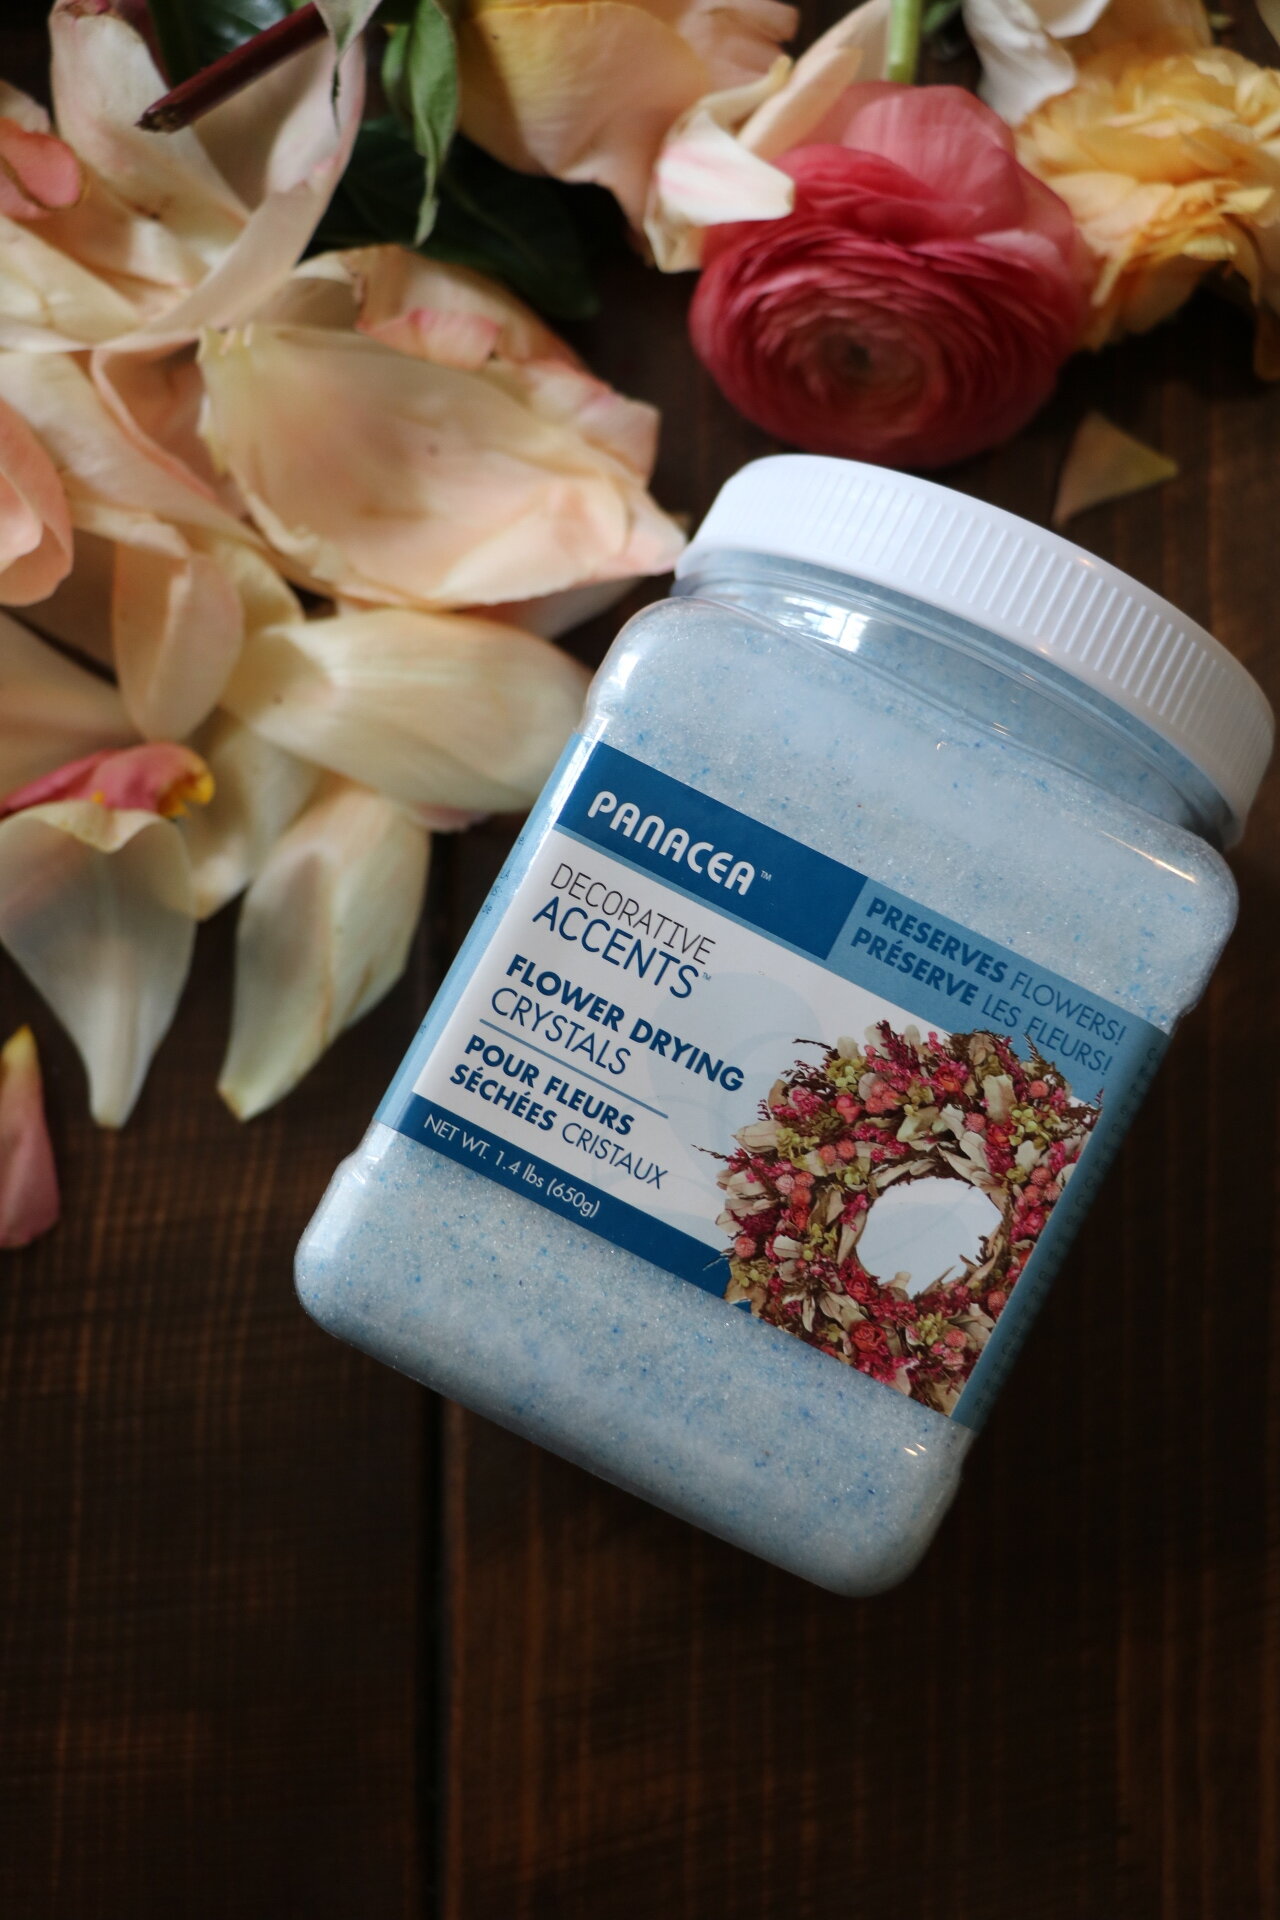
Drying crystals/silica gel (get multiple containers of this - you’ll need quite a bit)
Scissors
Airtight container
Fine paint brush
Shadow box
Hot Glue (you know I love me some Gorilla Glue)
Microwave (optional)
Disclosure: My content is reader-supported, which means that when you purchase through links on my site, I may earn an affiliate commission. Learn more here.
There are two techniques I tried here. I fully endorse the overnight drying method (technique #2) but I’ll walk you through how to do both here.
Step-by-Step Guide:
Snip the flowers close to the stem. Make sure you include a few greenery to add dimension for the final shadow box arrangement.
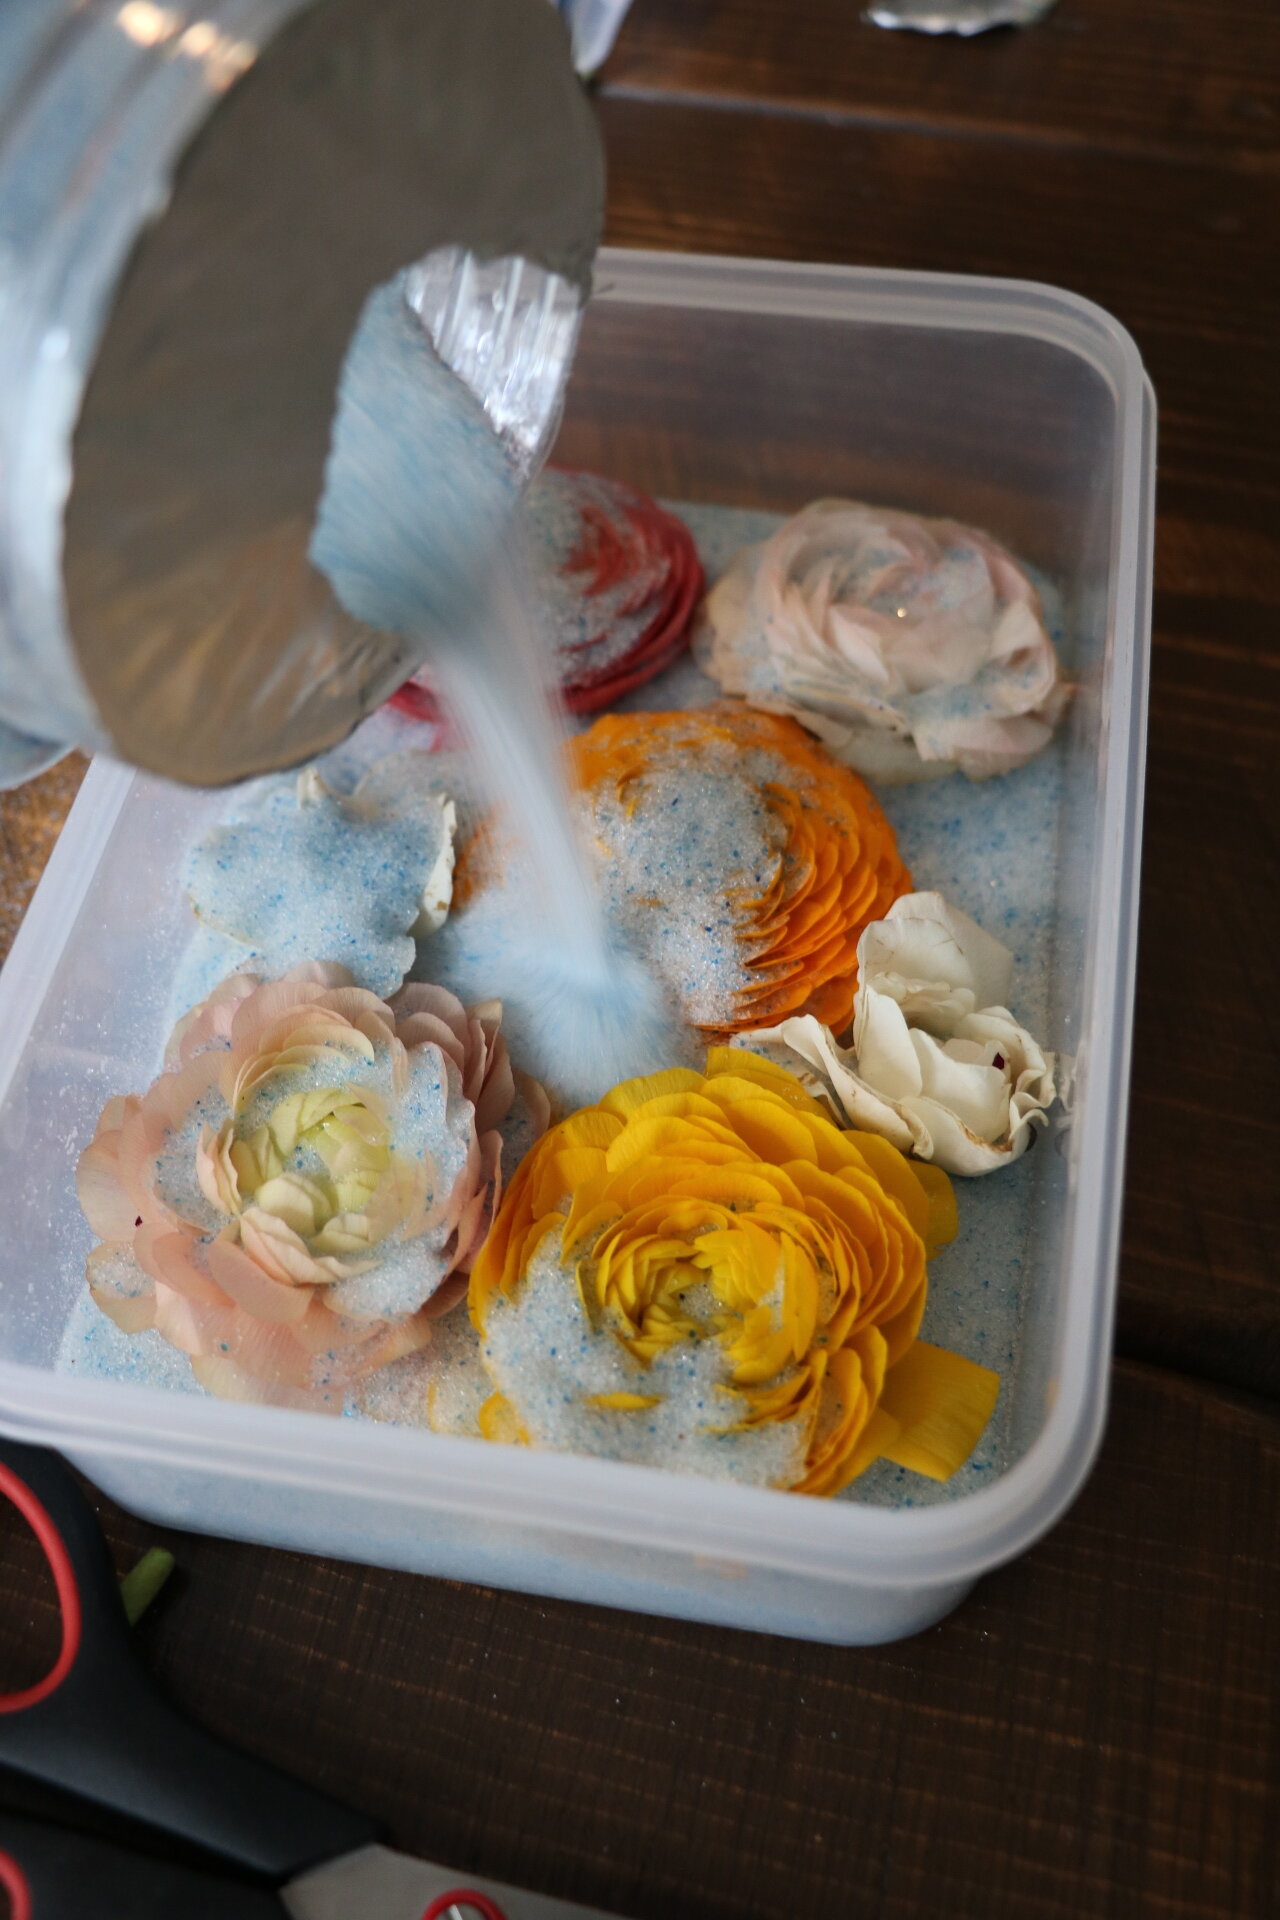
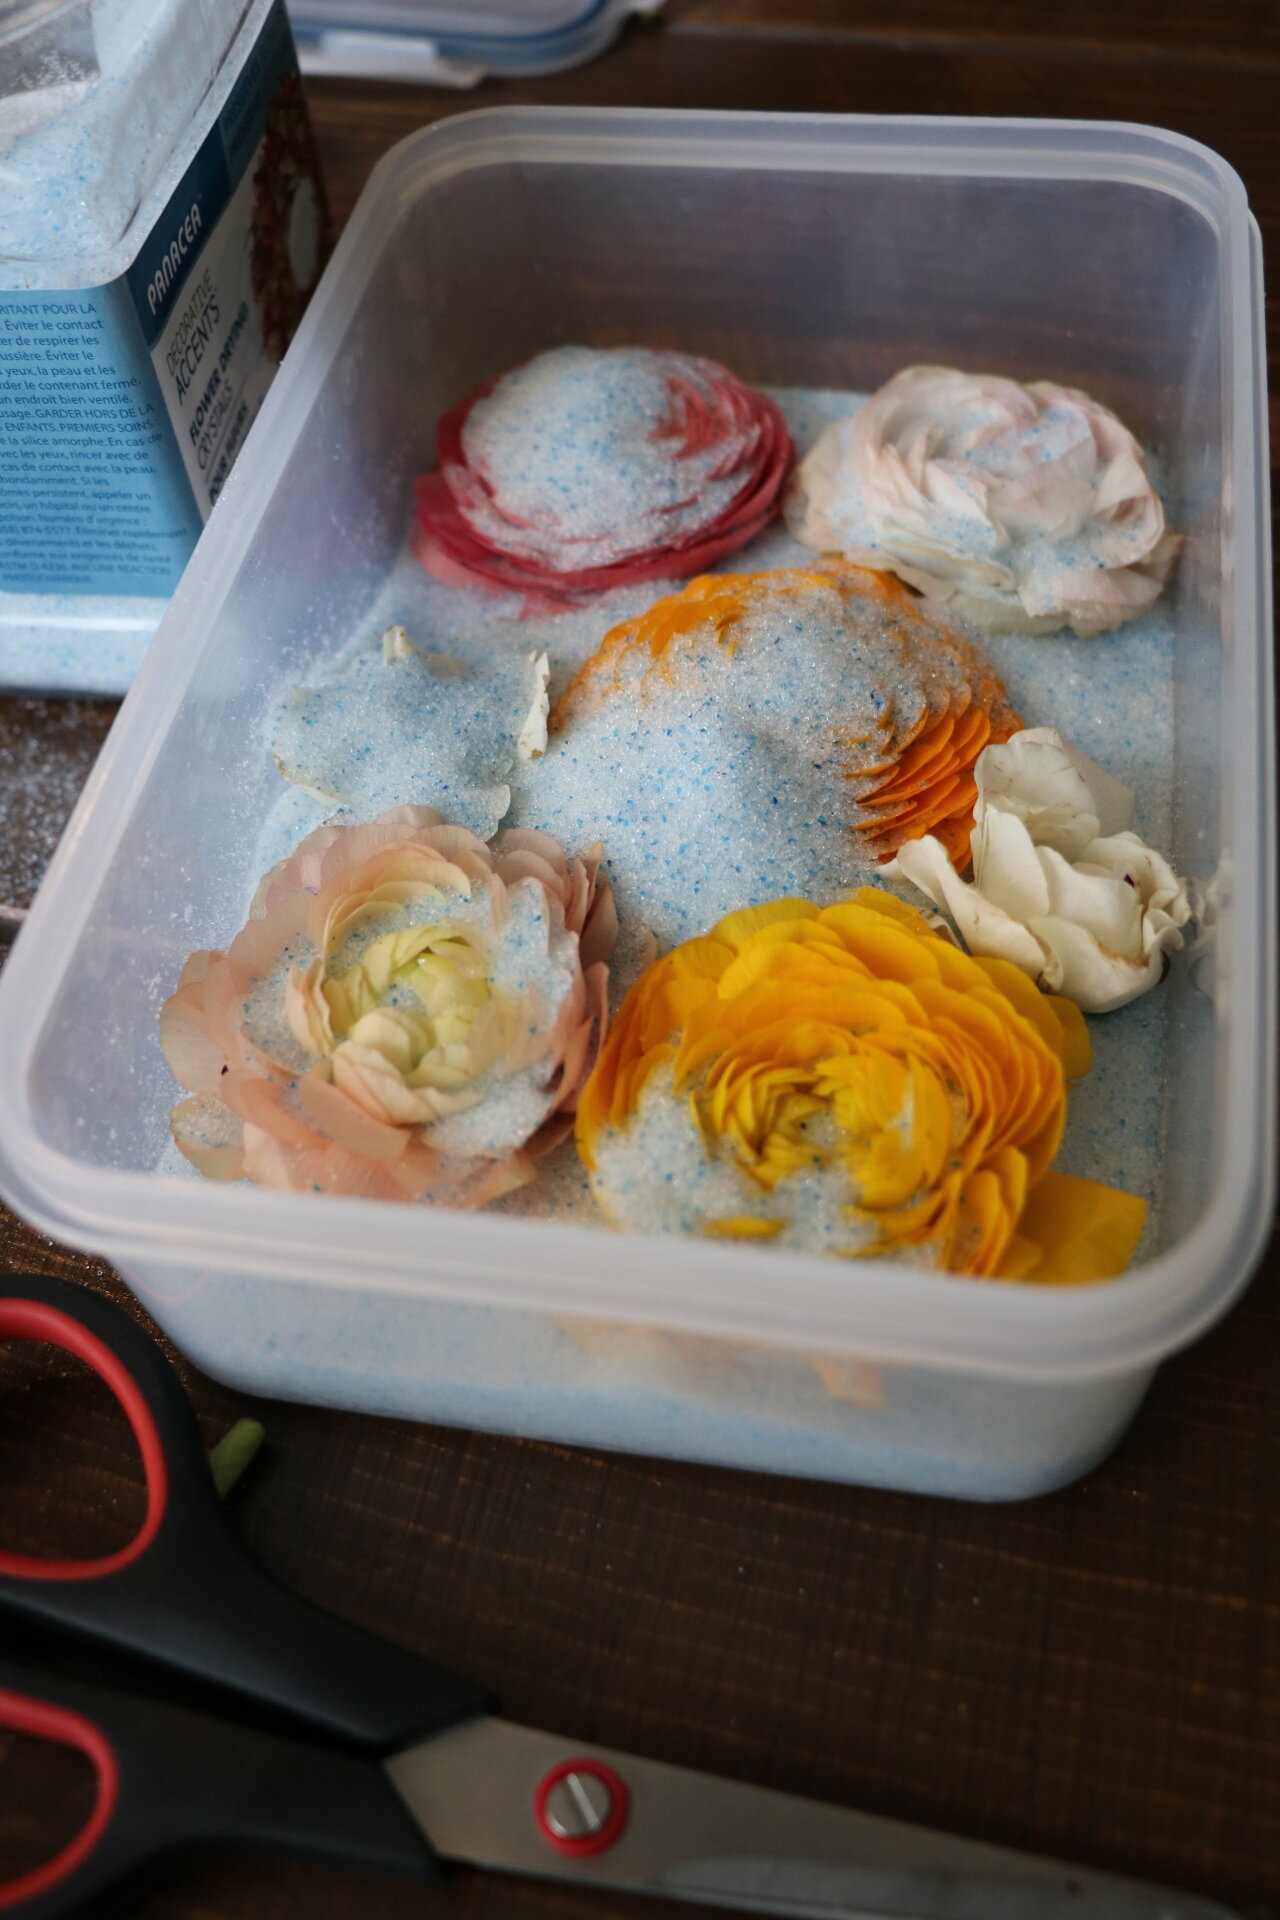
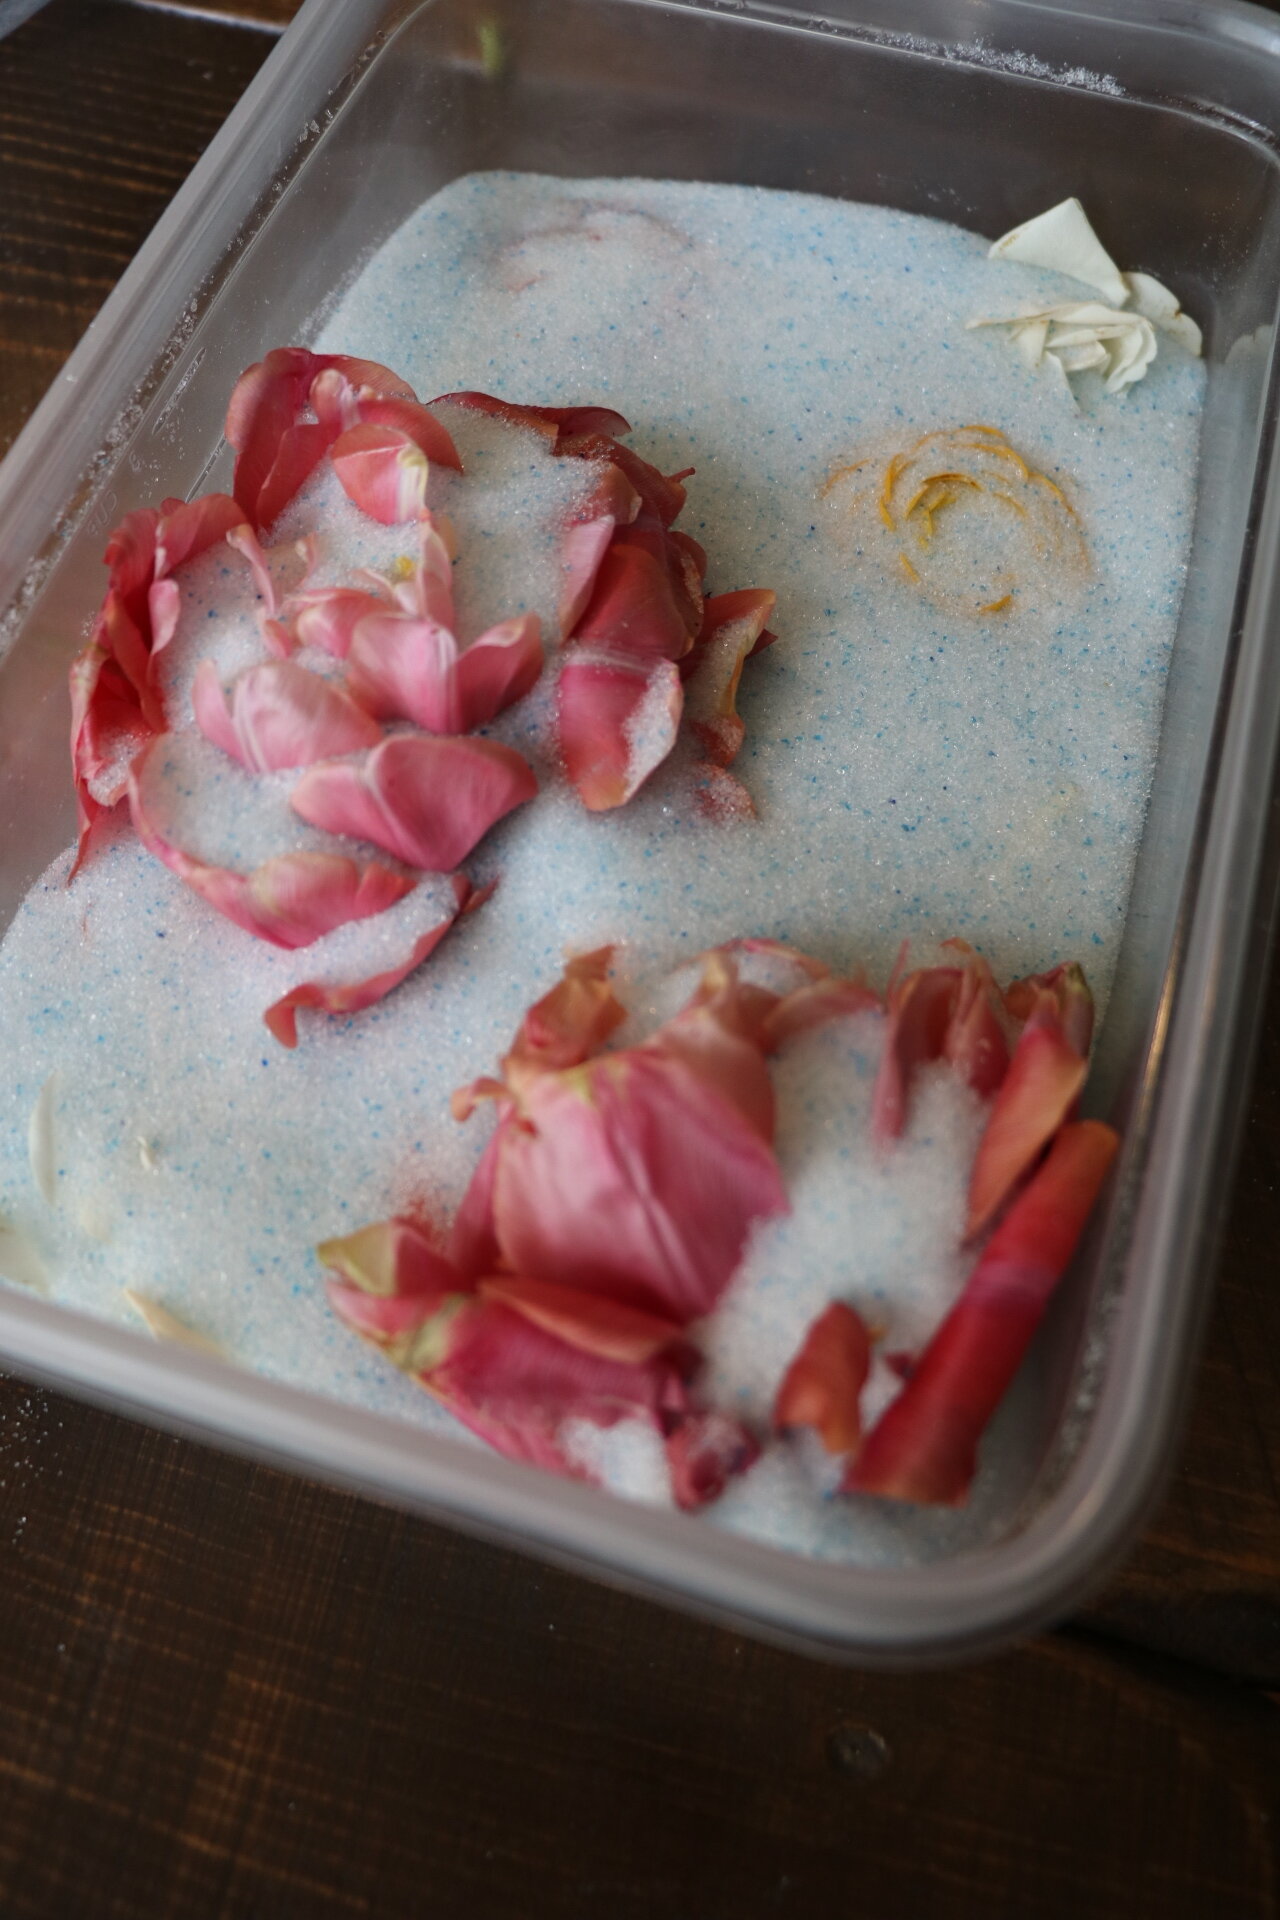
Pour a thin layer of silica gel in the bottom of your container. Lightly nestle the flowers into the gel. You don’t want to overcrowd them by overlapping flowers.
Slowly pour the gel onto the blooms. Get in between all the layers of the petals, but be super gentle while pour so the flowers stays intact. For things like peonies or garden roses, pour gel along the outside edge as well to really support the shape of the flower. Cover completely and seal the container shut.
4. MICROWAVE METHOD (Technique #1): Place container in microwave with a glass of water. Zap in increments of 45 seconds. Do not over-heat. Use a spoon to gently take out the flowers. The major benefit of this technique is that it’s super fast. And the blooms turn out pretty good! I tried this way first and was impressed with the results. The downside is that it’s a bit of a guessing game as to how much time is needed in the microwave, and if you over-do it the flowers getting yellowed and brittle very quickly. It’s a small margin of error.

Here’s the batch from Technique #1, right after coming out of the microwave. The color and shape stayed okay, but you can see that some of the white flowers turned yellow.
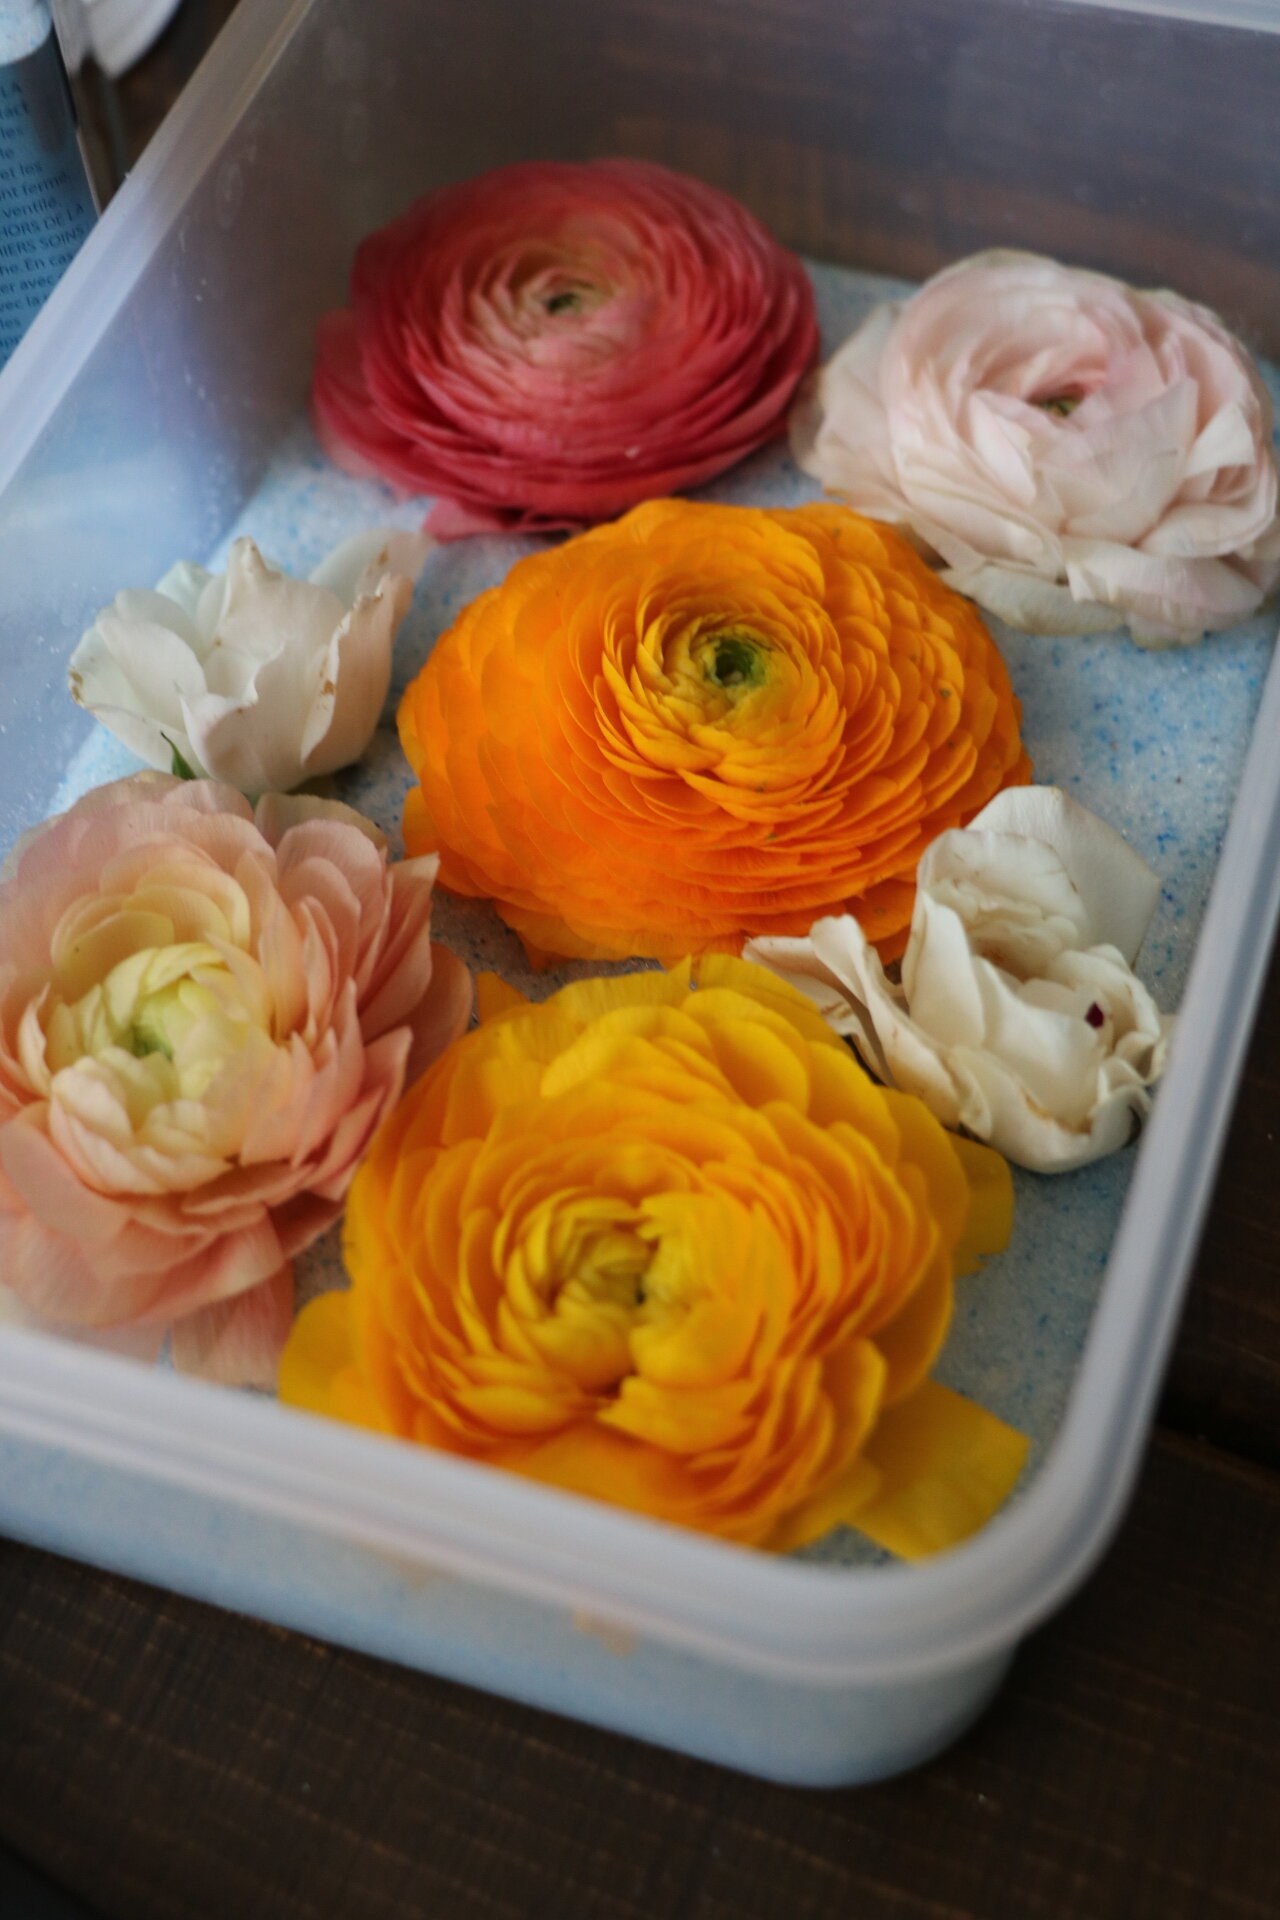
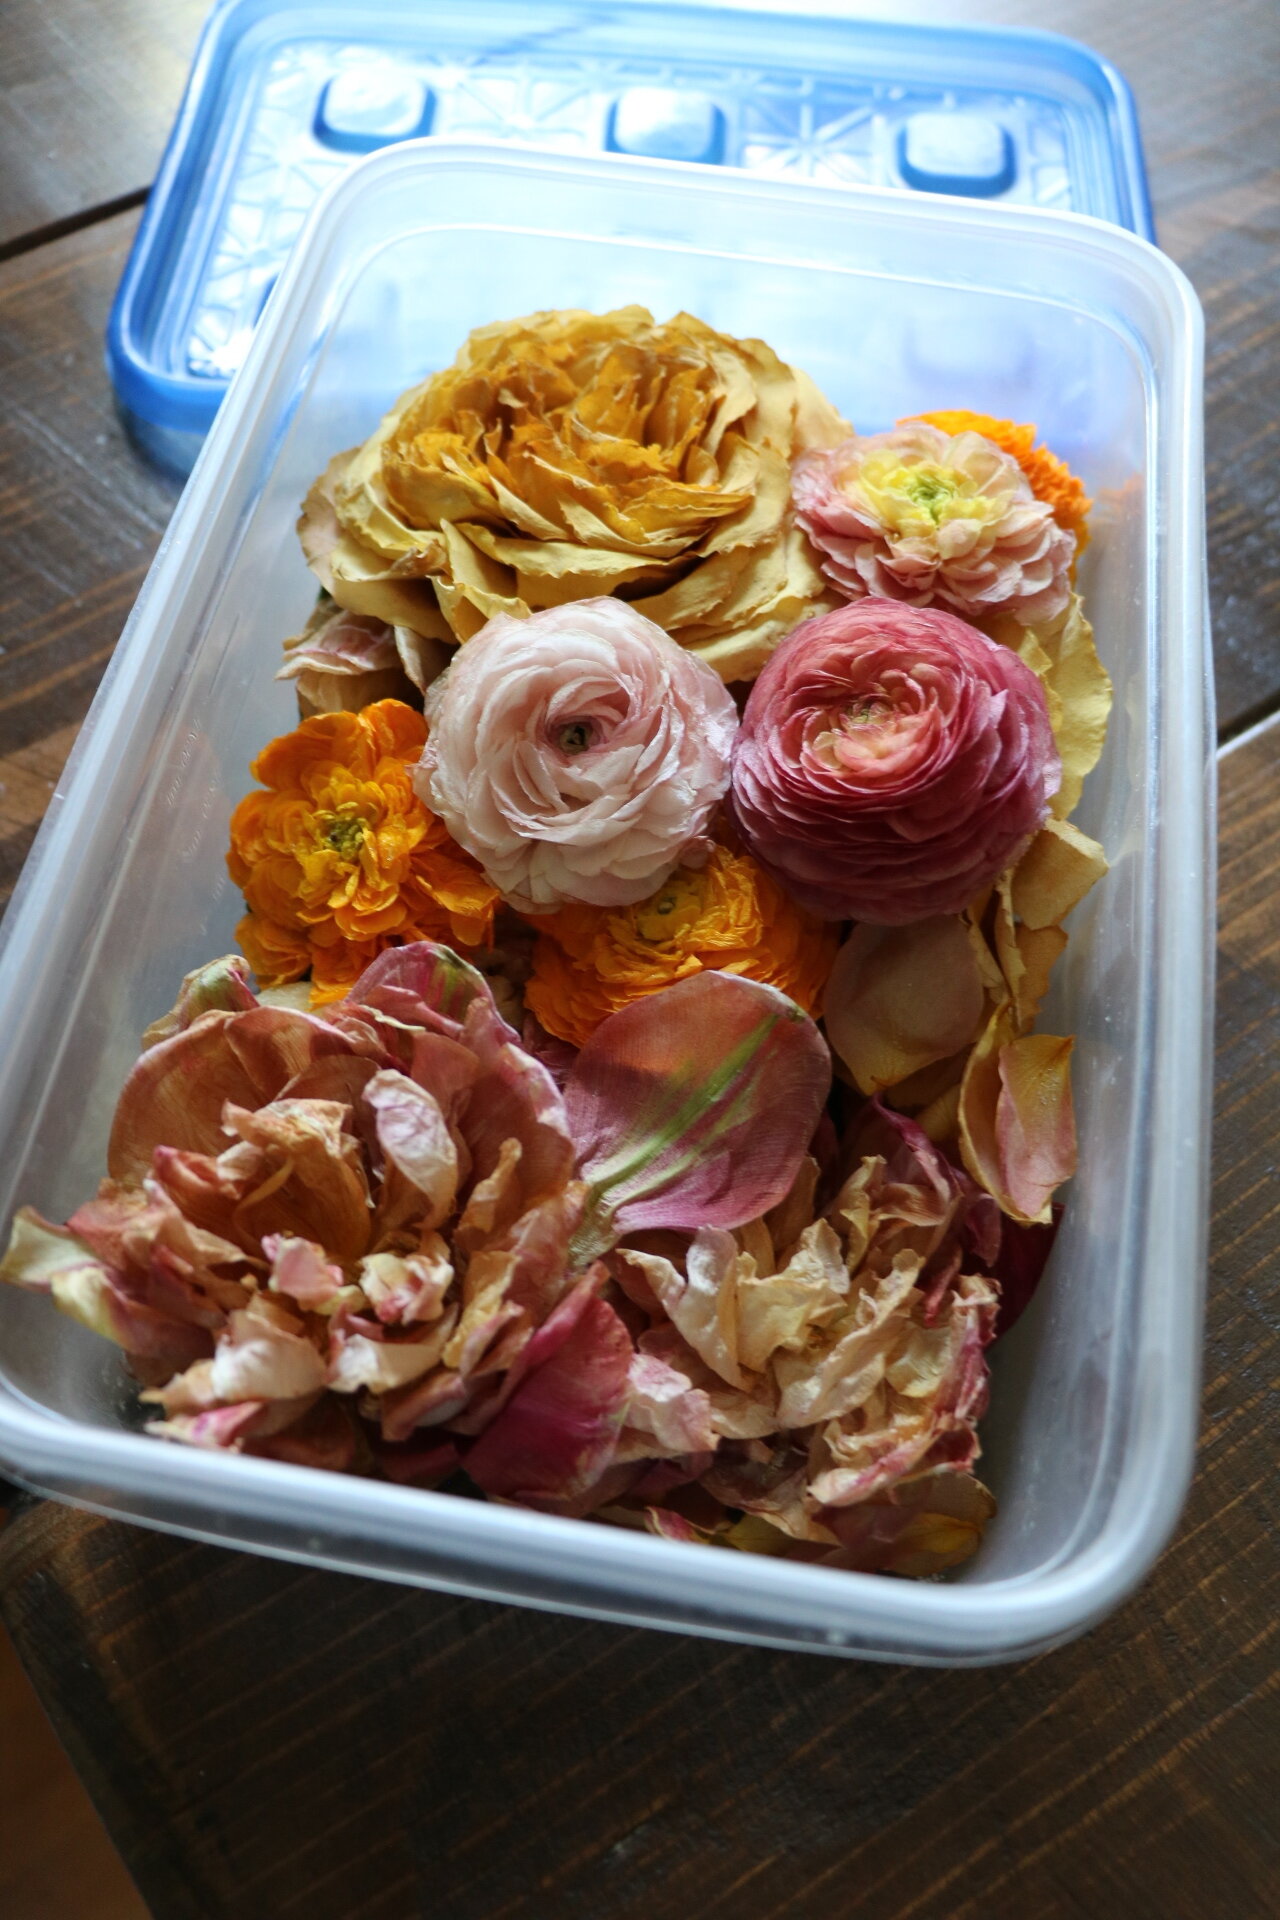
5. OVERNIGHT METHOD (Technique #2): Here’s where the magic happened. I highly recommend applying patience and giving this technique a try over the faster microwave method. Basically all you need to do is place your container in a cool, dry place for 2-3 days. That’s it. After the allotted time has passed, use a spoon to gentle take out each flower from the gel powder.
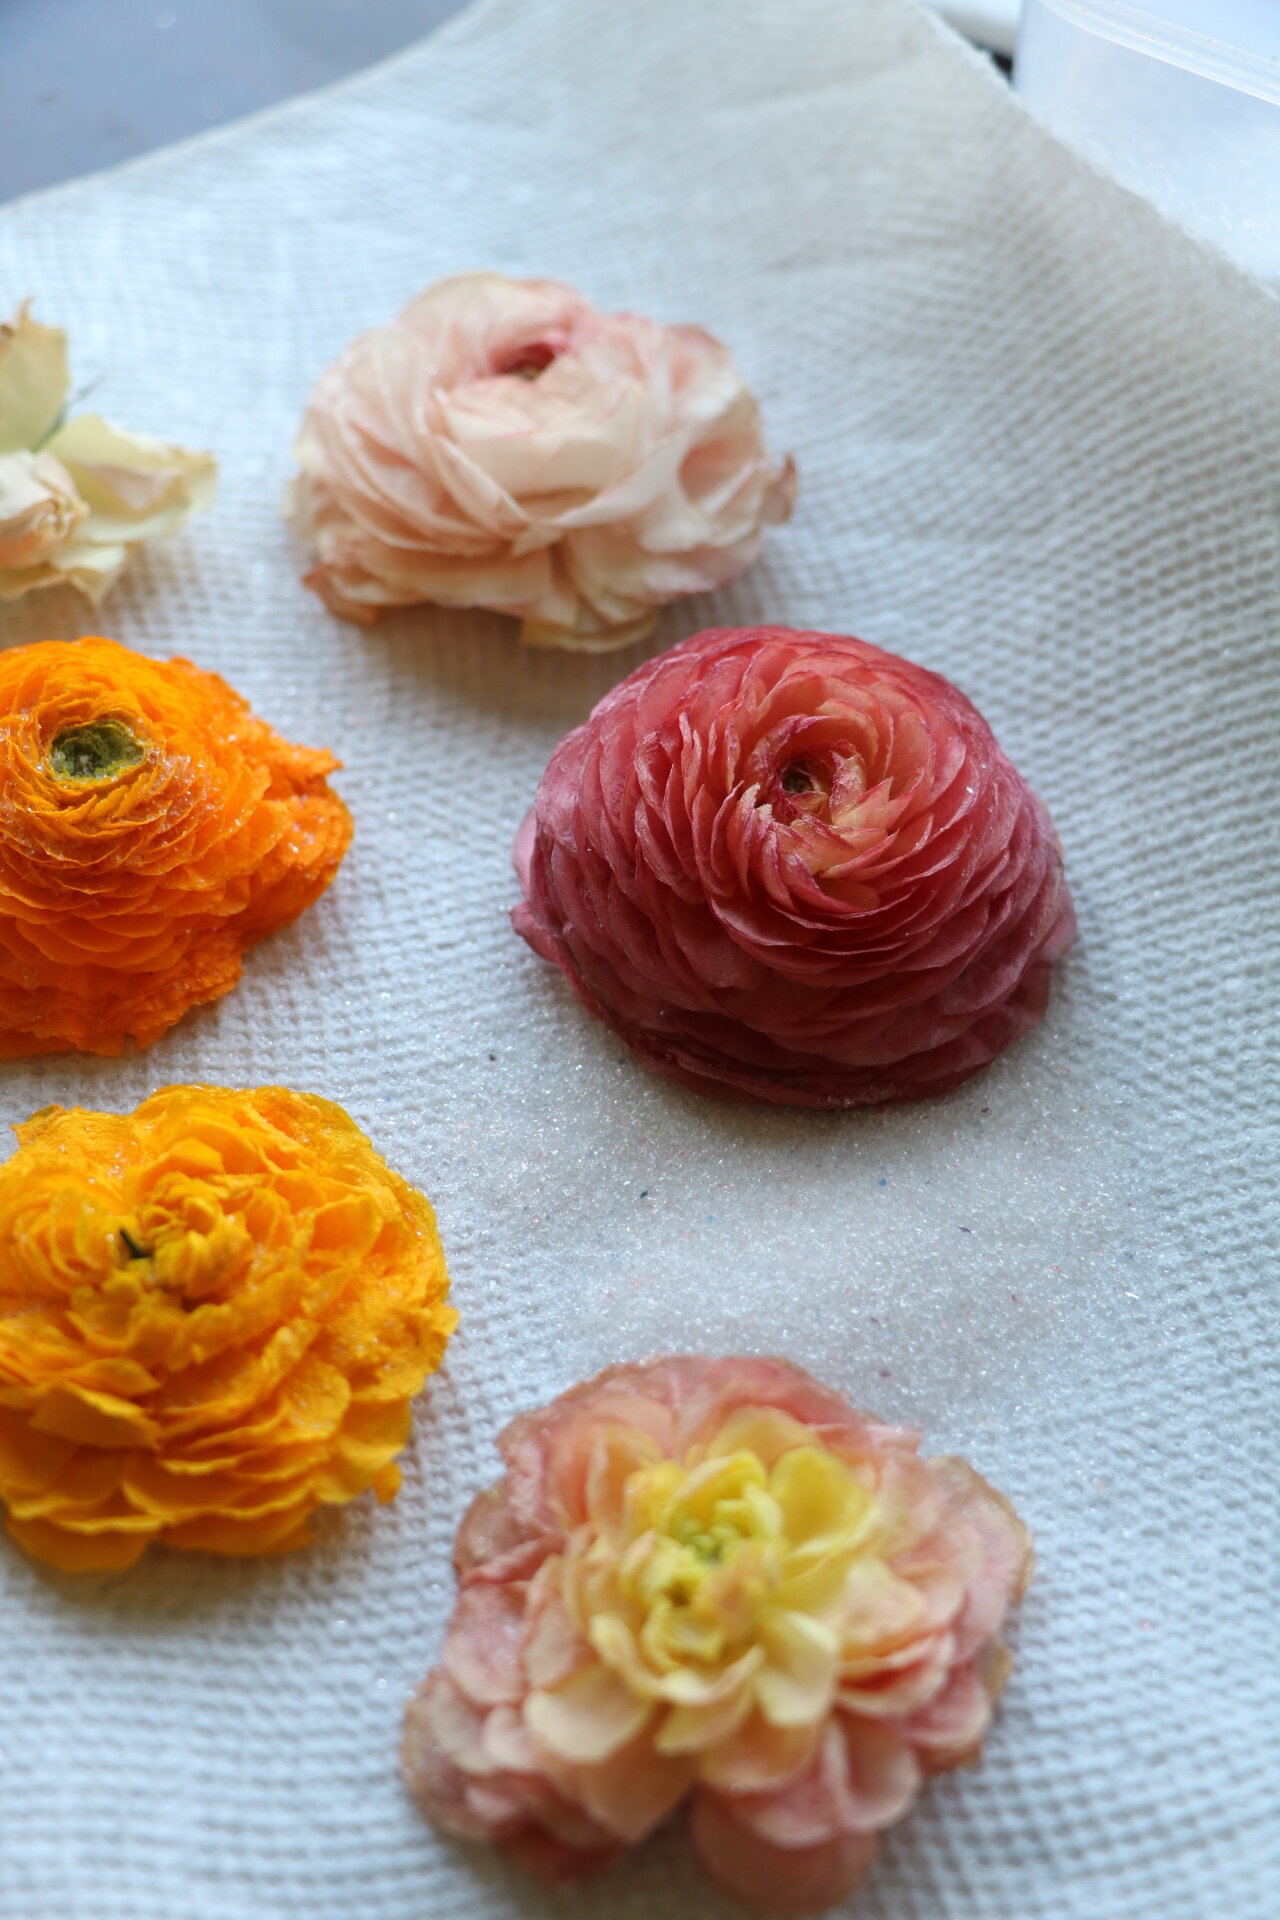
HOLY COW!! These are DRIED flowers! I actually gasped when I took them out of the container (I waited 3 days, btw). This technique is a clear winner.
(Whether you decide to do the microwave or overnight method, the rest of the steps for this project are the same).
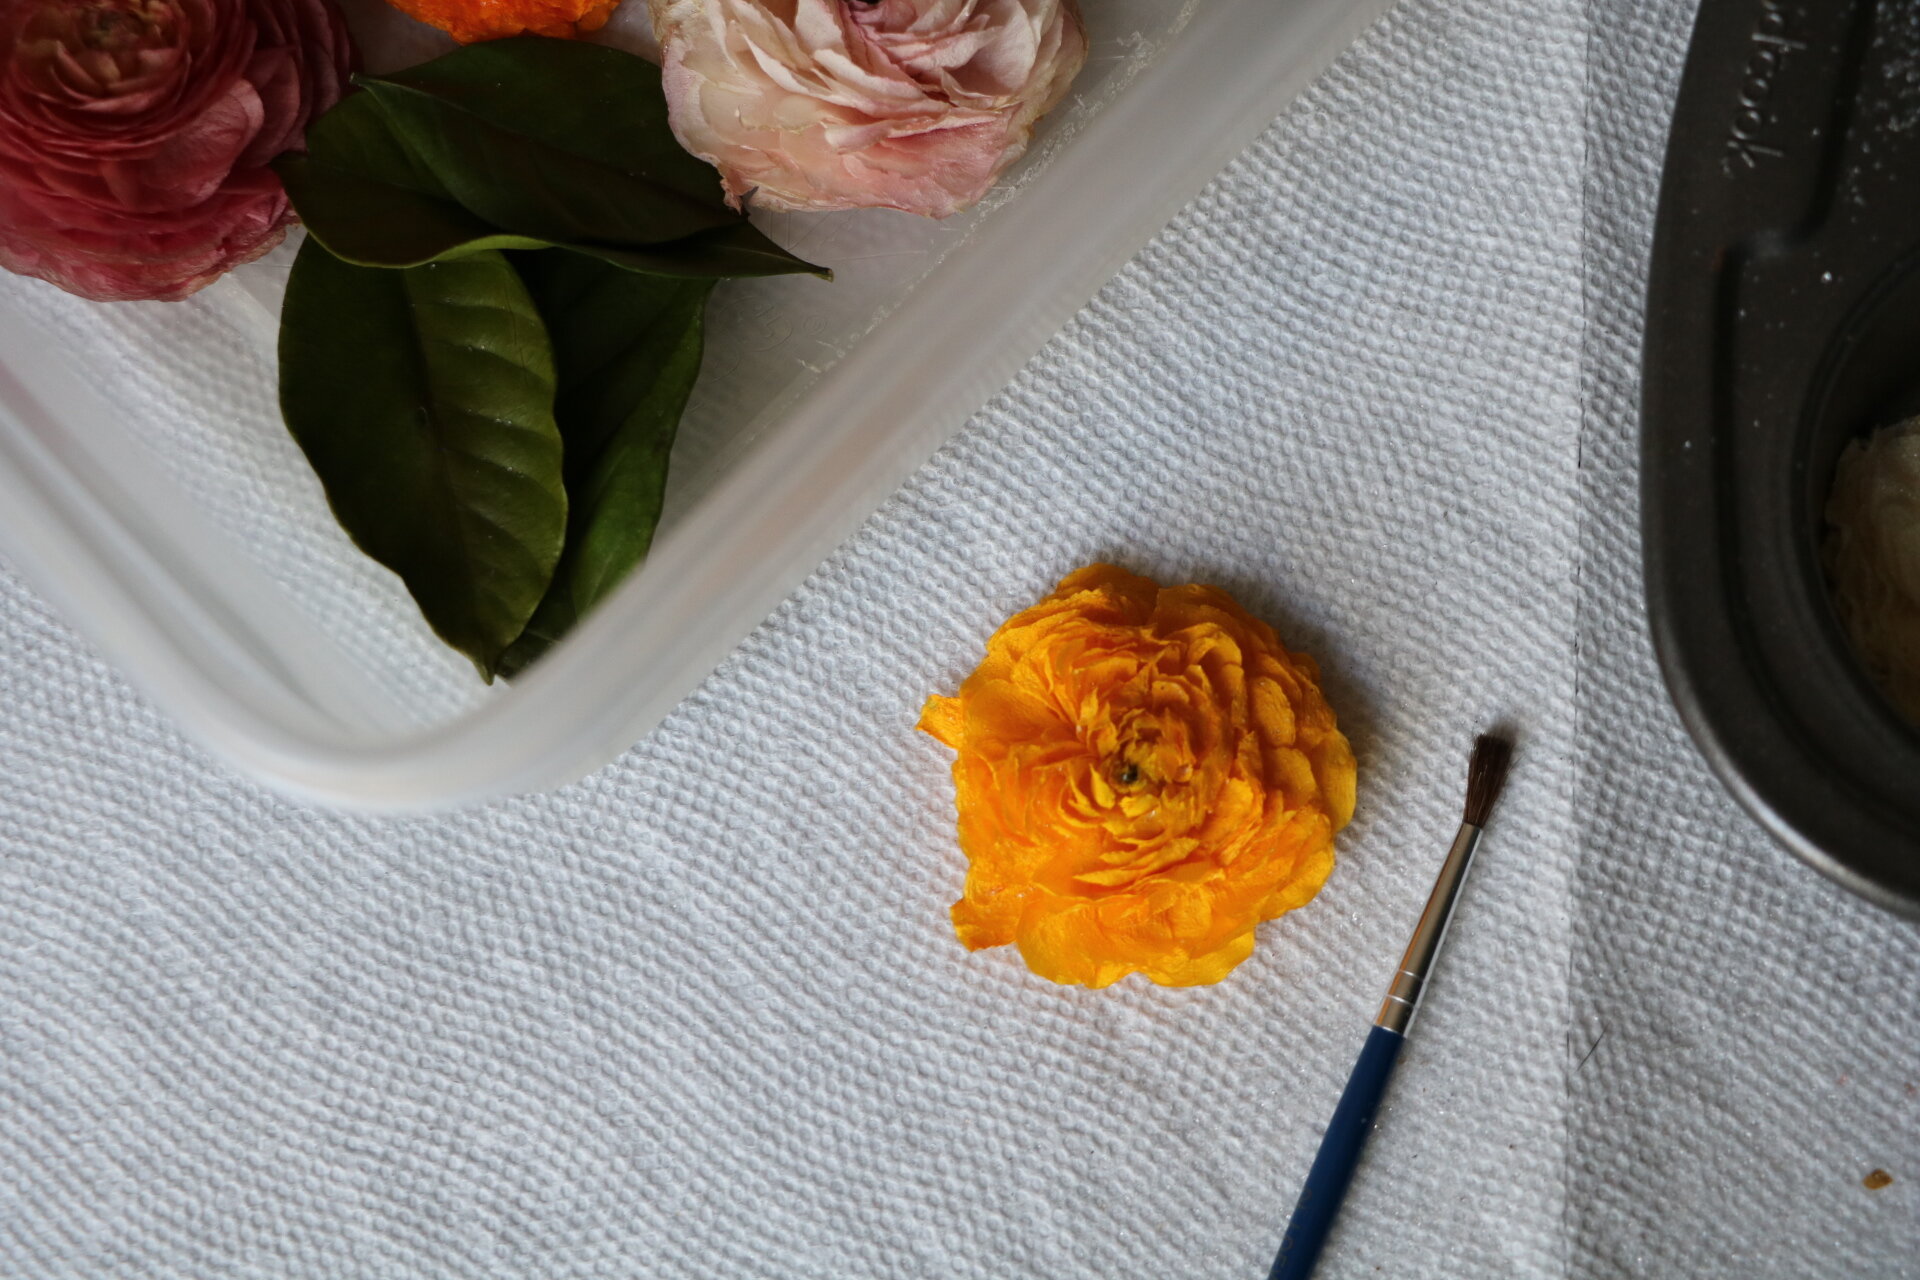
6. Using a fine paint brush, lightly brush off all the remaining powder crystals on the blooms. Make sure to get in all the nooks and crannies of the blooms. Otherwise, the powder will continue to dry out your flowers.
Here are the flowers I decided turned out the best and chose to use for the final shadow box display.
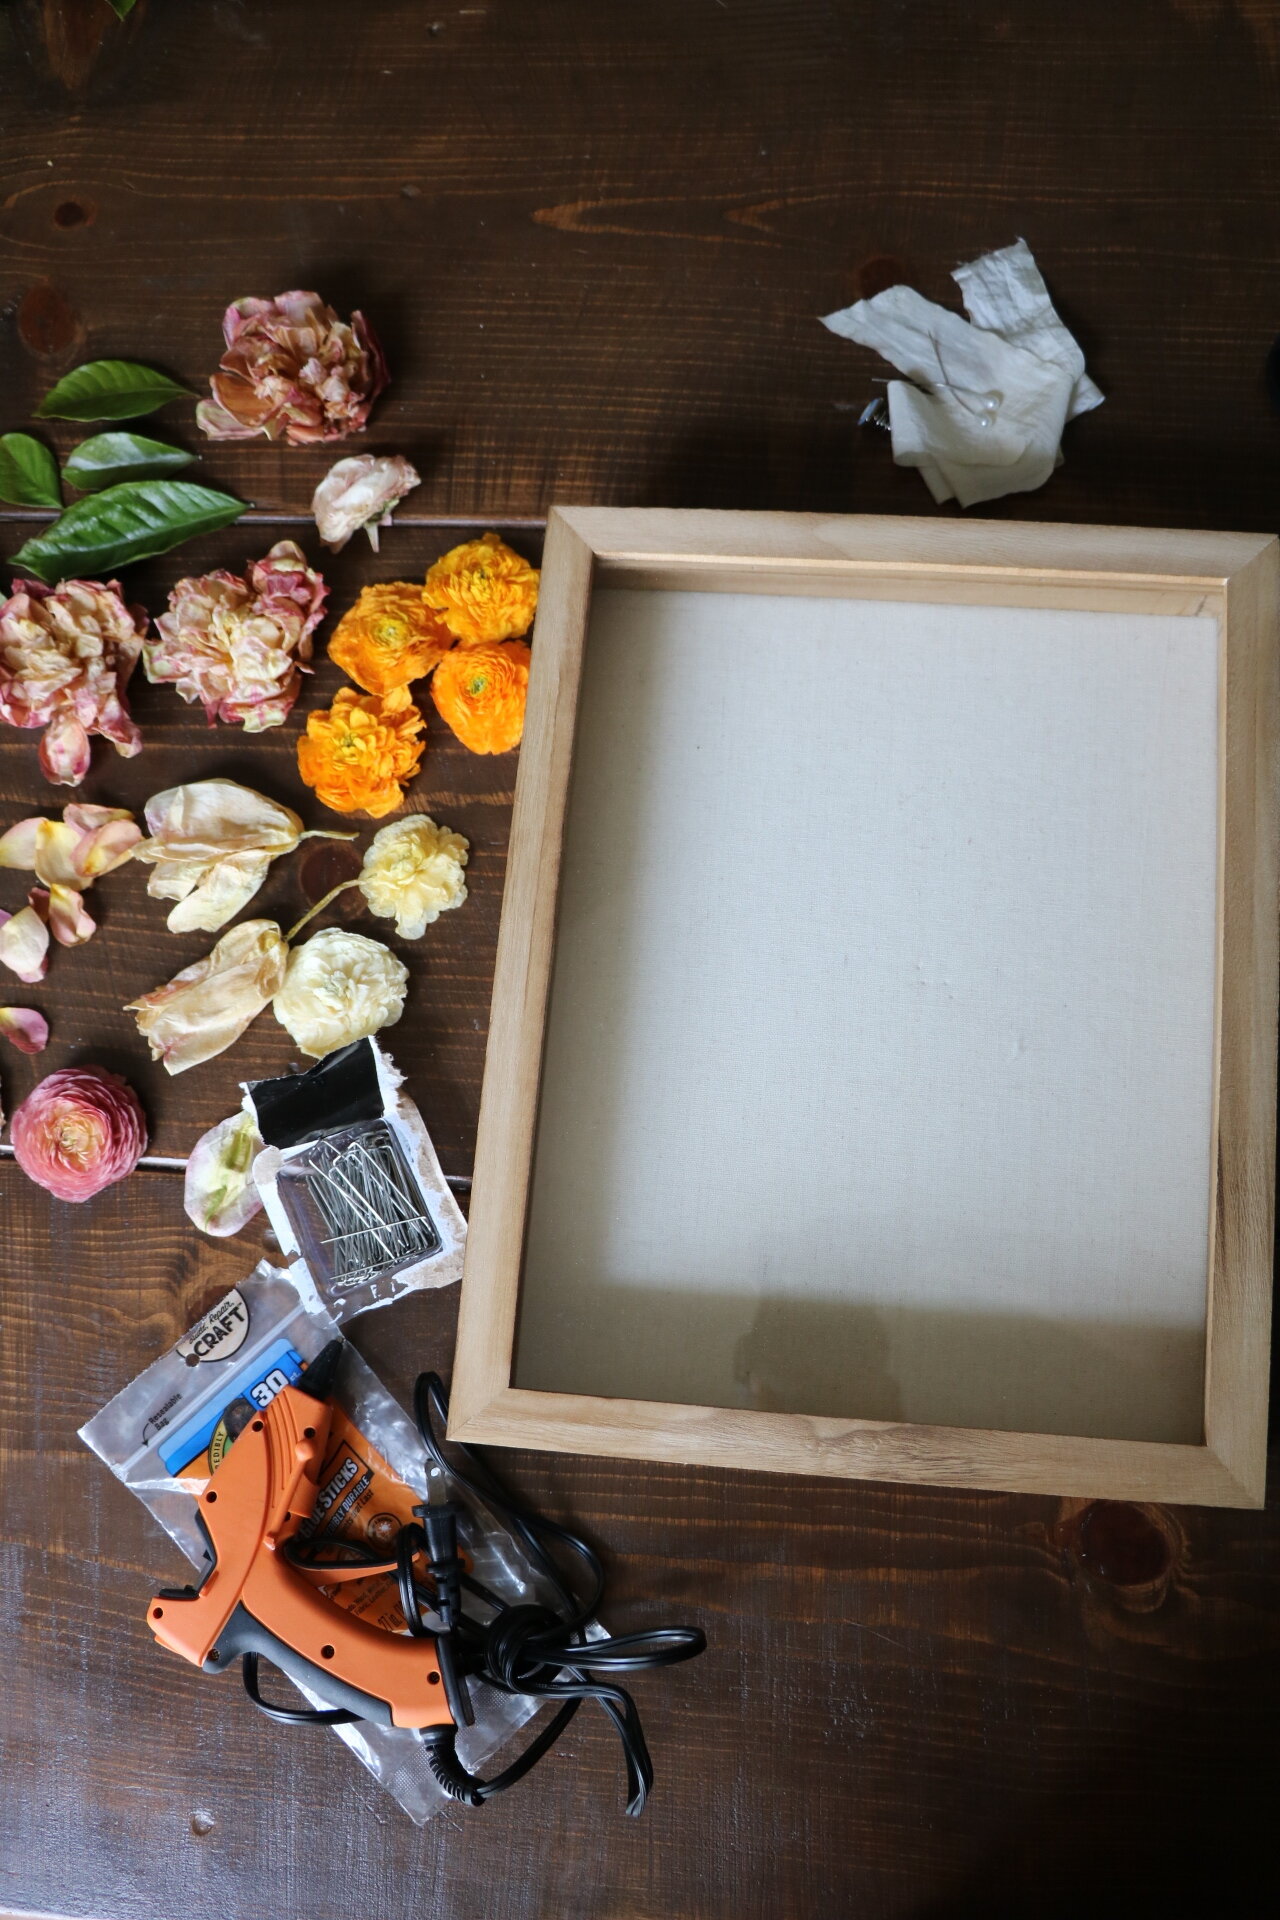
Materials needed for the shadow box display. Shadow box can be found here.
7. Arrange your dried flowers in the shadow box and use hot glue as adhesive. I had saved the ribbon and pins used to hold my bouquet together, so I added those to the box as well. Additionally, I had a cufflink of my Grandpas - he passed away a few weeks before the wedding and I wanted a piece of him with me on the day. This blue cufflink was perfect and I knew it had to be included in the preservation.
8. I added a few loose petals and greenery to complete the look. After you’re finished gluing all the blooms, close up the box and find a special spot to hang it in your home.

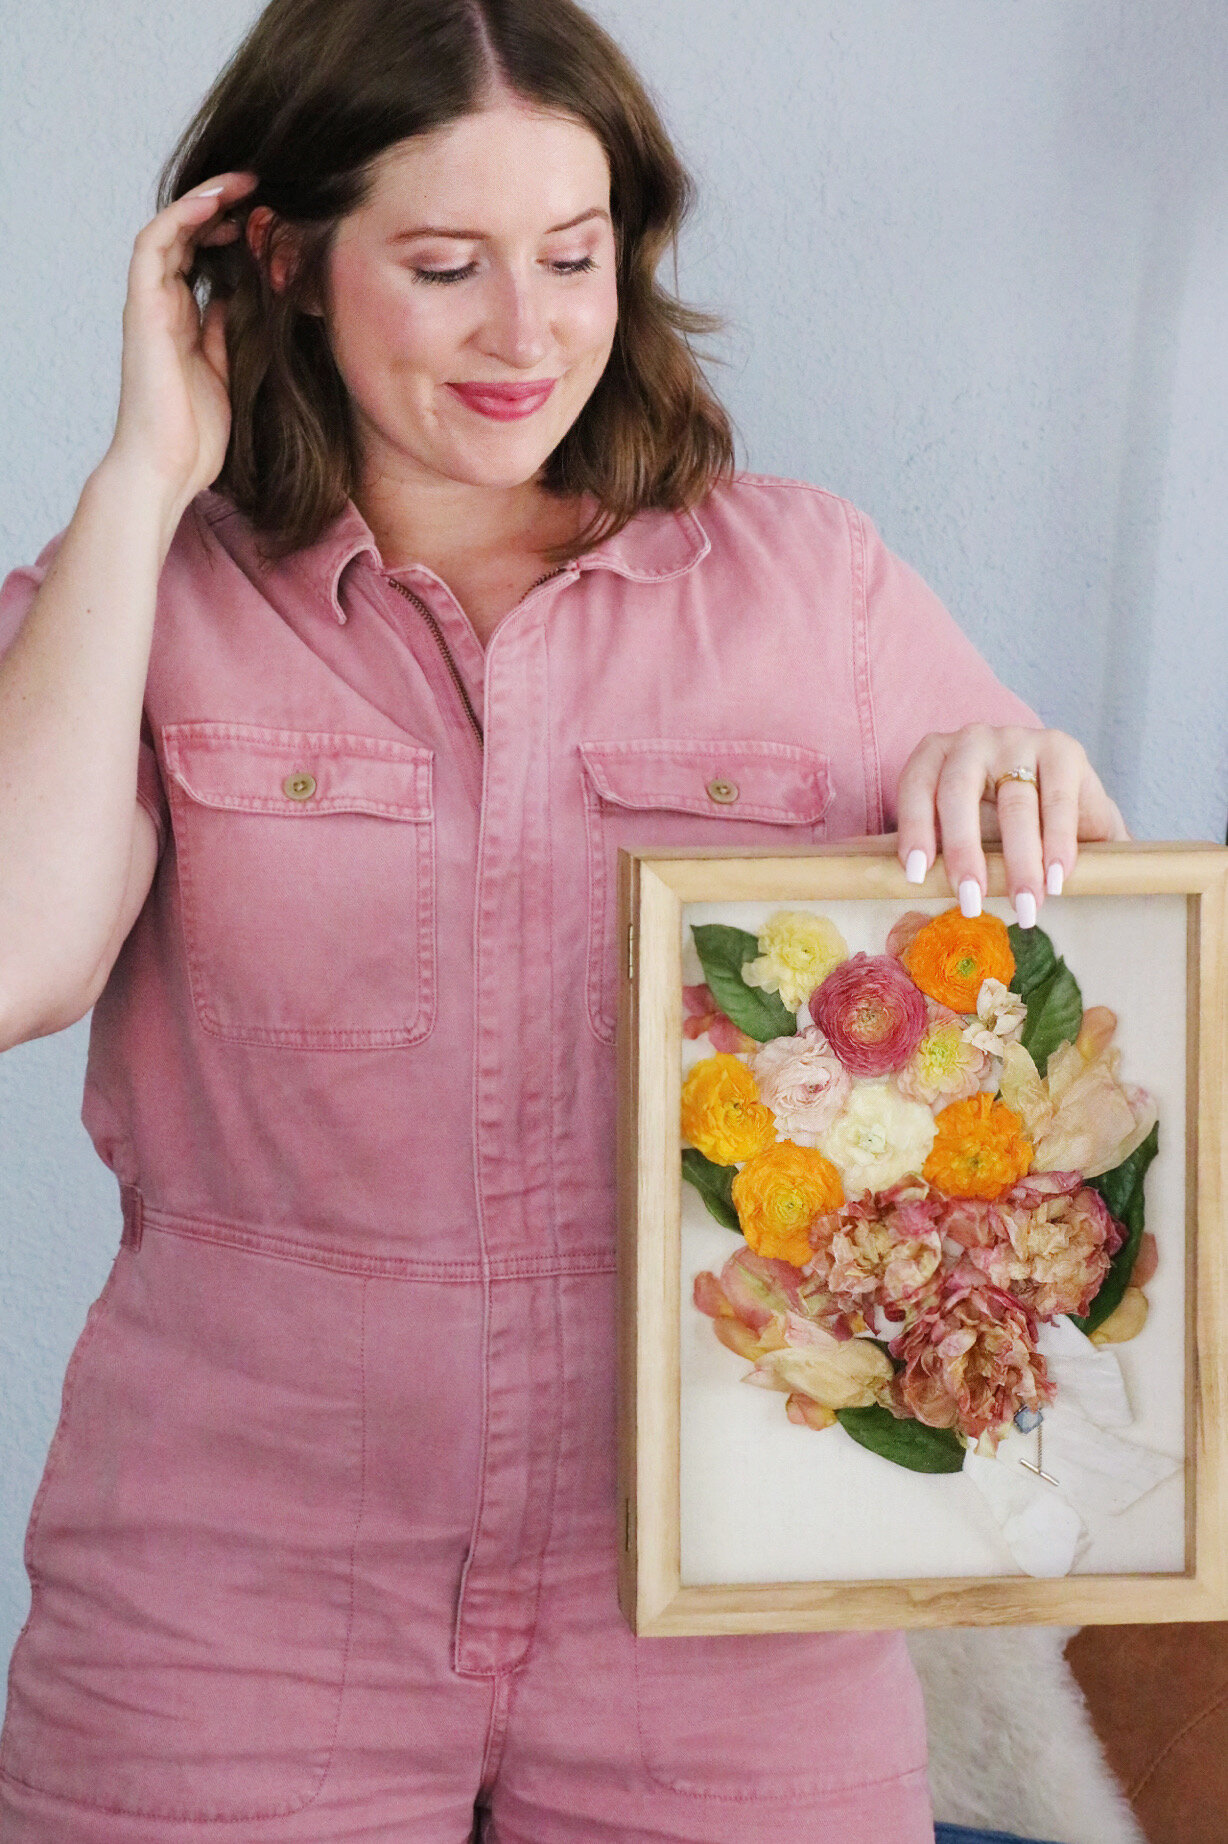
I feel really proud of how this DIY turned out. I love that the colors stayed so vibrant and the whole shadow box turned into art that I will happily hang in our home. There are services out there that charge a lot of money to preserve your wedding bouquet - why not save a bit of money and do it yourself? I’ll cherish the memory of our wedding forever, and I love that this shadow box display will make me smile each time I look at it, bringing back all the amazing feelings of love and excitement of our Big Day.