Wine Corkboard
Do you have a bunch of sentimental wine corks lying around and you’re not sure what to do with them? Here’s a fun DIY you can do that will both display them and use them functionally. Read on to make your own corkboard using wine corks!

MATERIALS NEEDED:
Wine corks
Wood board + wood for trim (I used poplar because I had it lying around, leftover from another project)
Wood filler
Panel nails
Circular saw (or table saw, if you have it)
Measuring tape
Super glue
Sawtooth hangers
Cork protective pads
Cutting board + knife
Push pins
Here are the first few steps. Cut your board + wood trim. I did 45° cuts on the sides, so it would fit together like a picture frame. Full disclosure - a table saw would be MUCH easier to use and way more accurate. But I didn’t have that available (damn you, non-garage living!!) so I did the best I could.
Sand down all of the wood, getting out all splinters and rough edges.
I used the Gorilla Glue to help hold the trim pieces in place before nailing. While that was drying, I began cutting the wine corks in half, staying cognizant of the pretty labels and trying to keep the pretty part facing up. Once the glue was dry, I nailed the pieces in place, using three nails per side.


Okay so the picture on the left is after wood filler and paint. I was trying to pretend that it looked fine but then after sharing the photo with my mom (she’s always honest with me!) I realized… it was not going to cut it. My use of a circular saw, and how inaccurate my angled cuts were, really hindered the look of the final product. No amount of paint was going to fix it.
So I took a slice of humble pie and tried again. I countersunk the nails, which immediately made the trim look smoother, and did another layer of wood filler. After drying time, I painted again and knew that my decision to redo was the right one.
Here’s what I learned: be accurate with your wood cuts. Be honest with yourself about how the project is turning out. Countersink the nails, always. And honestly - just buy a frame next time (ha!).

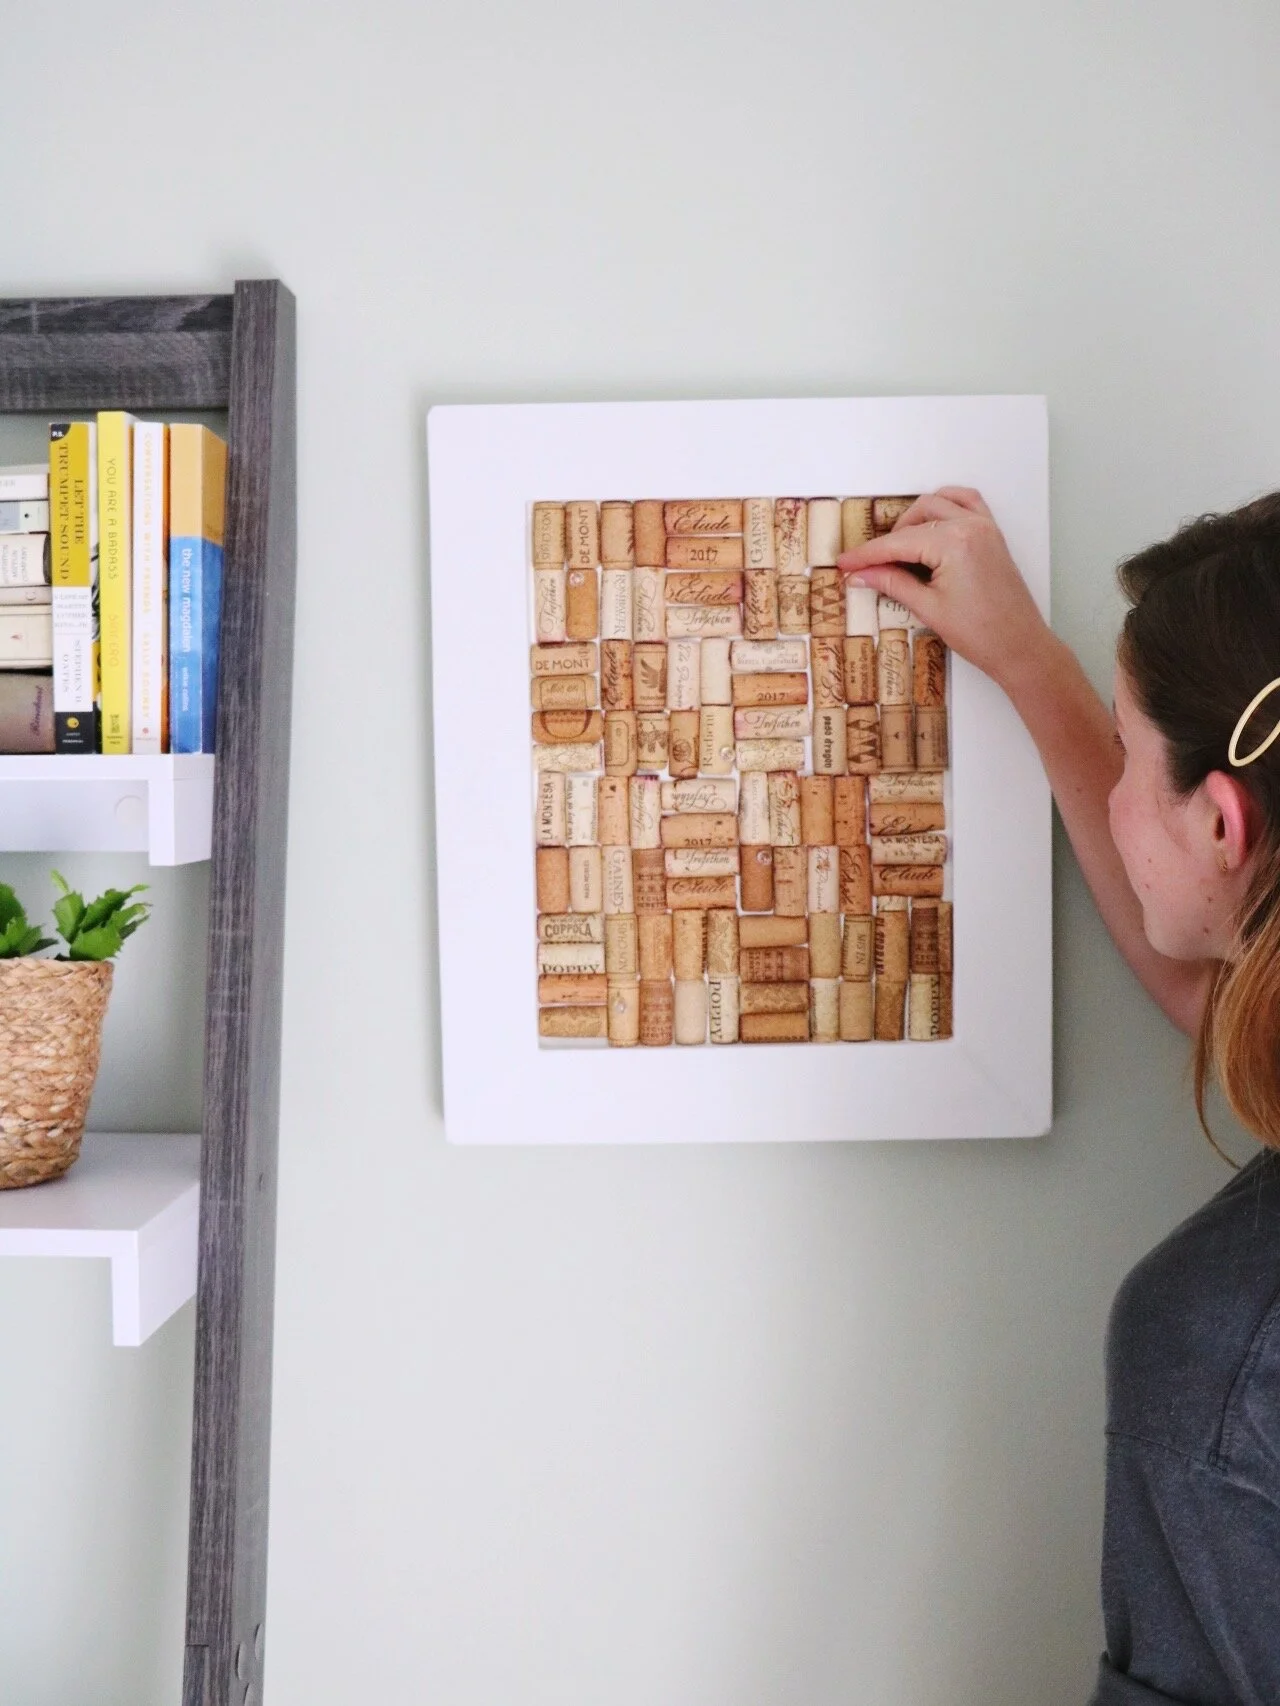
Onto the decorative part! Using your gorilla glue, dab a liberal amount on the back of each wine cork half. I alternated the pattern, but this part is up to you and the final look you prefer. Funny story: not all wine corks are created equal in size. It takes a bit of time to find similar-sized corks, hence the wine. I finished the second half the next morning, attached the sawtooth hangers on the back, and I was done!


How cute does my client Angela’s home office look?? I like that the wine corkboard is complimentary to the rest of the space, and serves both a functional and decorative purpose. The pushpins I got were rose gold & clear from Target.
This project was almost a DIY fail, but at the end of the day, it turned out great. It’s always a good learning lesson when things don’t go according to plan. It shows that even DIY experts don’t always get it right the first time. My advice: if at first you don’t succeed, try again!